Recovering deleted files on Fedora 15 using the photorec utility
linux fedora utility So here is the scenario; I’d taken some photos of a special occasion and wanted to copy them to my usb key so that my girlfriend could take them to be printed. Simple stuff huh.? Well normally yes, but when I gave my girlfriend the usb key last time instead of finding just the handful of photos on there that she expected there were dozens of them displayed when she plugged it into the kiosk.
These were of course in the hidden .Trash folder on the device but I didn’t think to clear down the recycle bin. Well, I was not going to be caught out like that again so this time I deleted everything on the key, opened the Trash folder and clicked ‘Empty Trash’. Now all I had to do was drag and drop the photos from the camera and drop them onto the usb key. A fraction of a second too late I realised that I was not dropping the files into the usb key folder but into the trash instead! My heart missed a beat until I thought to myself “no matter, I’ll just click the Restore button and put them back”. It was then that I saw that while the files had disappeared from the camera they had not reappeared in the Trash folder. Using Nautilus and the Terminal I trawled the system looking for the missing file but to no avail – they were gone.
OMG, I was the only one taking photos and now I’d taken the only copies I had and trashed them – what the hell was I going to do? I know what my girlfriend would have done if she found out!!! Well, as it happened my salvation was just a yum install away.
The answer to my prayers was a package called testdisk which contains a utility called photorec which saved my bacon.
The photorec utility is run as root from the command line with a simple sudo photorec which brings up the following interface.
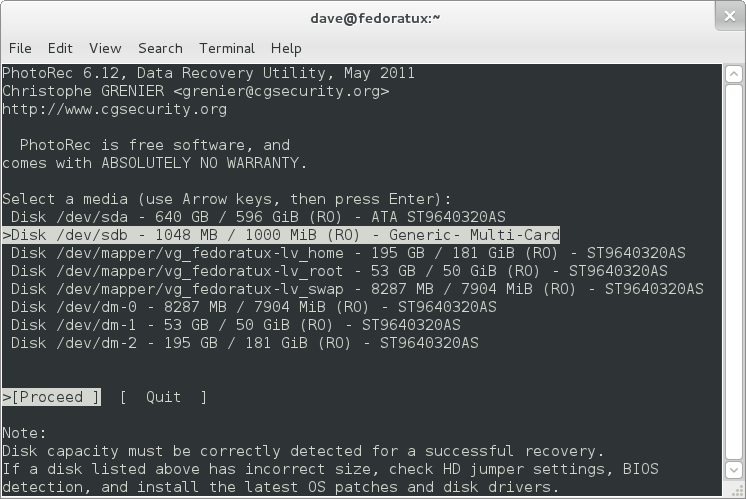
Using the arrow keys select the appropriate drive (the above screenshot shows my XD card selected) and press enter to move onto the partition type screen (below). Now the XD card can be read by my Linux and Windows systems so I selected the Intel/PC partition option and that worked well for me. If you think that your drive may have a different format then I suggest finding out before progressing any further.
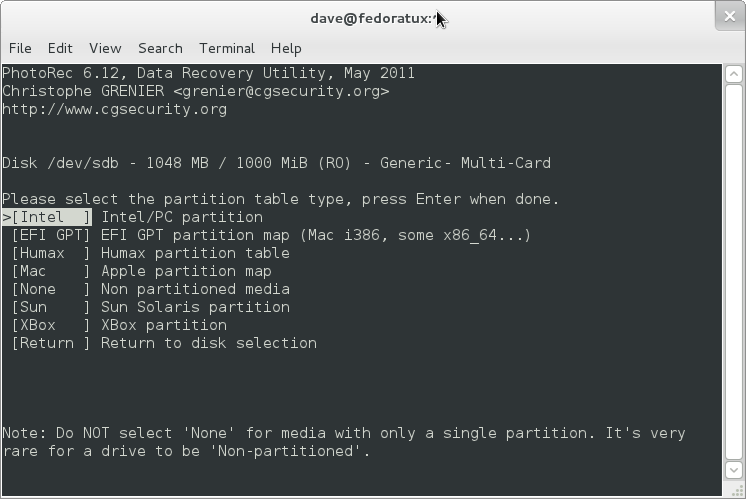
Make your selection and press enter to continue.
This next screen was a bit confusing to me as it didn’t really say what I was expected to specify. I opted to ignore the ‘No Partition’ option and again, this seemed to work for me.
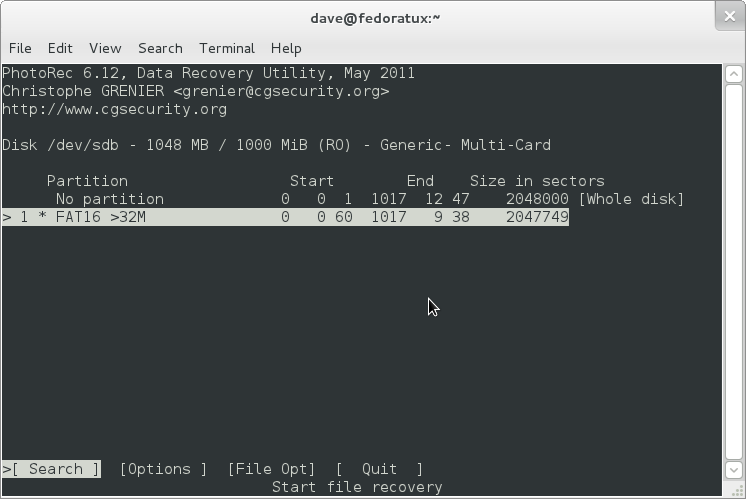
Make your selection and press enter to continue.
Next we need to specify the filesystem type (different from the filesystem format) and knowing it was not ext2/ext3 (because they are Linux filesystems and as already mentioned my Windows system can read the card with no problem). I opted for ‘Other’.
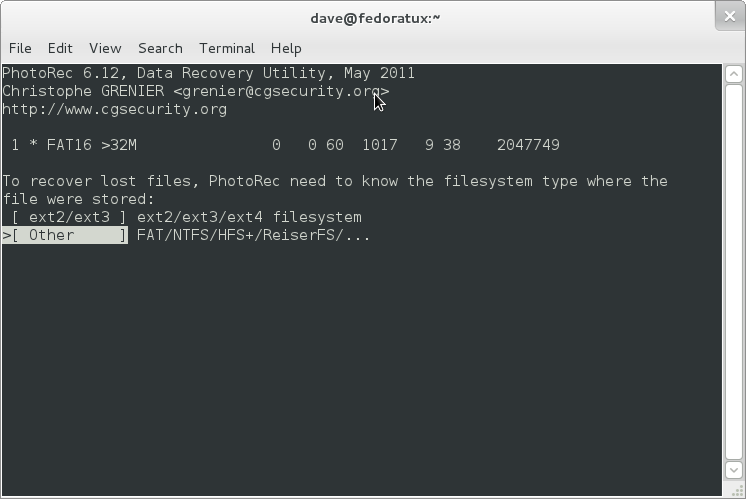
Make your selection and press enter to continue.
The next screen is asking where to scan for the missing files, Free will look at the unallocated space on the drive while Whole will look at the entire drive – to be on the safe side I opted for the latter but then I was only looking at scanning a 1GB card, if you have a bigger drive then maybe looking at the unallocated space (which after all is where you hope your files are then choosing the Free option may suffice).
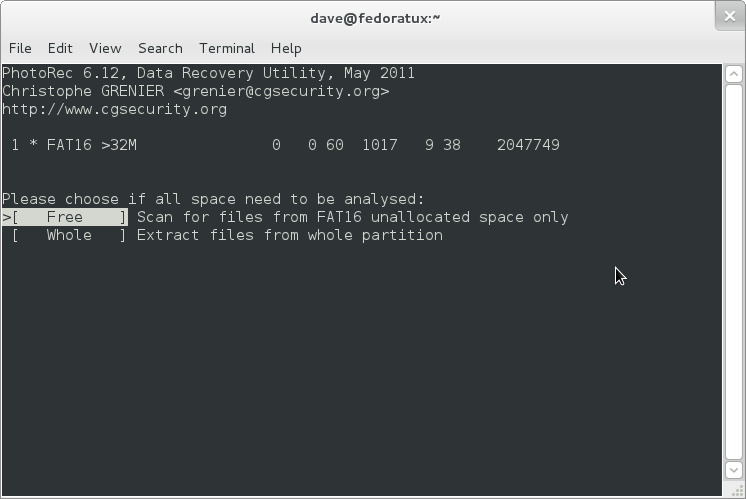
Make your selection and press enter to continue.
Finally we are asked where we want photorec to save any recovered files. Navigate through the file structure using the arrow keys to select and enter to open folders until you are in the desired location (I created a new folder called recovery for my files). Press ‘C’ to continue.
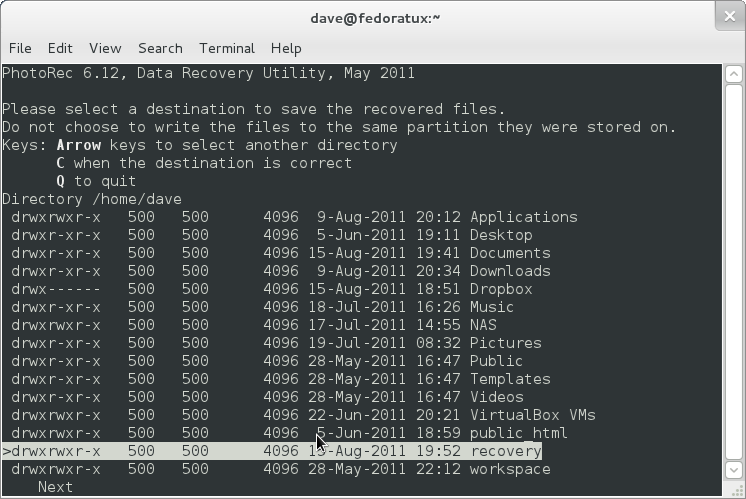
Photorec will now scan the device and save any recovered files to the location specified. It took about 3 minutes to scan my 1GB XD card.
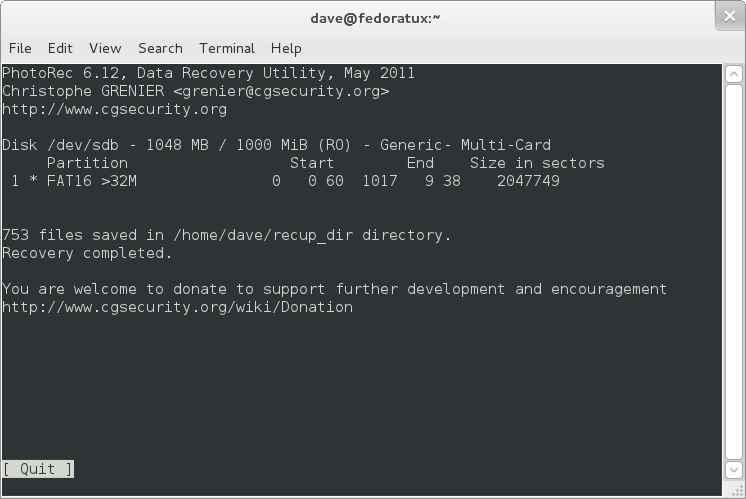
With the process complete it was time to open the recovery folder I’d created and see if, by a miracle, this free utility had saved my bacon. I was certainly relived to find the photos that I thought I’d lost and quickly copied them over to my NAS (and Dropbox just to be sure).
The recovery folder did not just contain these photos though, as you can see from the above screenshot, it contained hundreds of files. Now I fully expect that some of these files will be unreadable due to some sectors of the disk having been reused since they were deleted, but as no writes had been committed to the card since my little mishap I was confident that the files would be OK. Thankfully I was right and as requested in the above screen I will be making a donation very soon.
So if you ever find yourself in the same position, fear not help is at hand. Open Source to the rescue once more.

Comments
Comments are now closed0 responses