Like most .NET developers computers, mine has picked up a number of SQL Server installations over the years, even since I last paved and reinstalled everything.
I had installations for 2008 R2, 2012, 2014, 2019 and (the reason I noticed the others) the latest version, 2022. I also had three versions of SQL Server Management Studio installed - all chewing up hard drive space.
Now, it’s not like I’m a digital hoarder - these installations were required to work on client projects during my, soon to be rekindled, contracting years. While everyone wants to run the latest and greatest technologies, sometimes that isn’t possible so I needed to be sure that I was configured to run their code without compatibility issues.
But surely there is a better way than cluttering up my hard drive …. and that’s where Docker comes in.
Sure, Docker isn’t a new thing - it’s been around for years now but while I had a working knowledge of it I’d never had a reason to use it, or at least I didn’t think I did.
Well - that’s not quite true. I had previously used Docker on the Mac I’m using to type this post. Back in January 2020 I was attending an ASP.NET Core 3.1 workshop at NDC London and didn’t know if my Surface Pro would cut the mustard. So I decided to use the Mac, .NET Core is cross platorm afterall, and spun up a SQL Server instance suing Docker so that I could follow along - which I did, without issues.
Turning my attention back to my Windows systems the first thing to do was remove all the installed SQL Instances and tools like SQL Server Management Studio. This wasn’t as easy as you’d think with so many dependancies between one component and another - but I won’t dwell on that.
With Docker Desktop installed the process of spinning up a SQL Server instance was actually pretty easy, even the creation of volumes on my local machine to allow me to persist my database files - allowing me to blow away a Docker container without losing the actual data.
The first thing to do is pull the official Microsoft SQL Server image which is as simple as opening a command prompt and enter the following:
docker pull mcr.microsoft.com/mssql/server
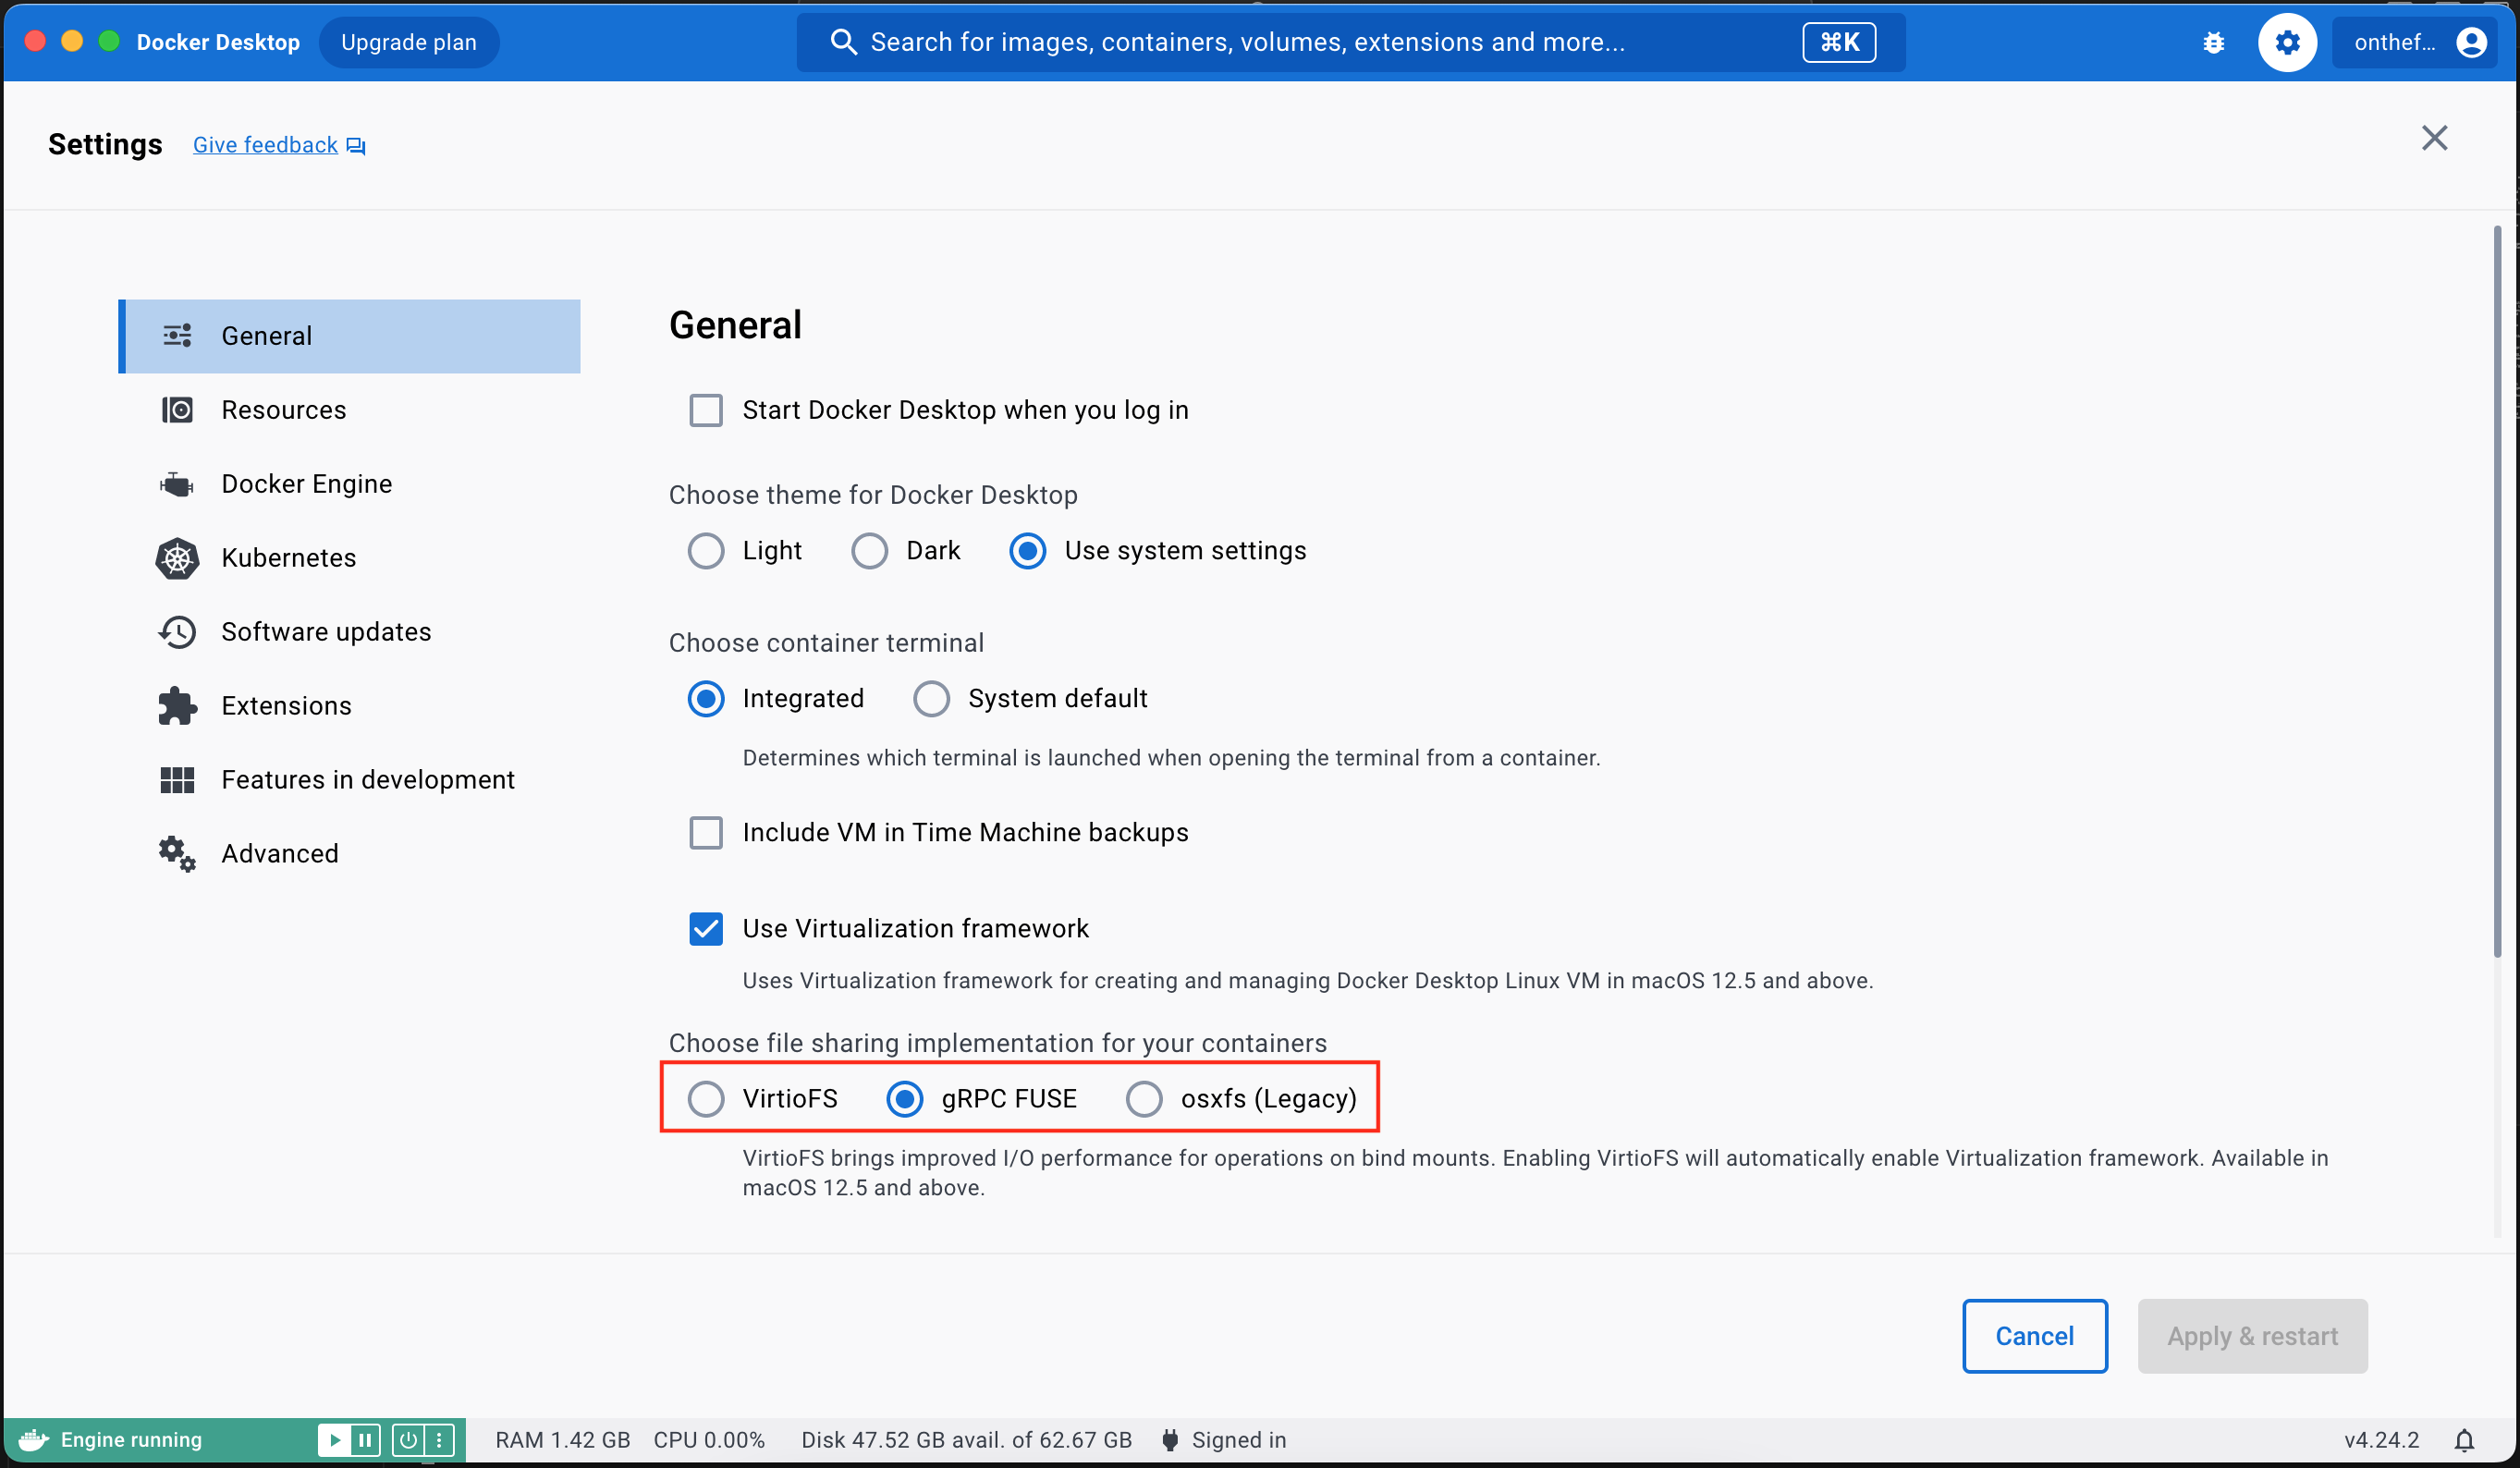
Note that if you are using a Mac with Apple Silicon (currently an M1, M2 or M3) then you will need to change this to fetch the following image instead: mcr.microsoft.com/azure-sql-edge
Opening the Images tab in Docker Desktop will show the image which can now be spun up into a running container that can be accessed via SSMS.
The Docker Hub page for MS SQL Server details a couple of required environment variables that need to be configured.
| Variable Name | Setting |
|---|
| ACCEPT_EULA | Y |
| MSSQL_SA_PASSWORD | this will be the 'sa' password used to access the instance* |
| MSSQL_PID | This will default to 'Developer' if not specified which is what I need so I'll be omitting this configuration going forward |
- Password reuse is never a good idea at the best of times but be aware that the password will be visible in Docker Desktop so you really don’t want to use one that you use elsewhere.
The next step is to create a container based on this image, configuring the environment variables so that we can access it.
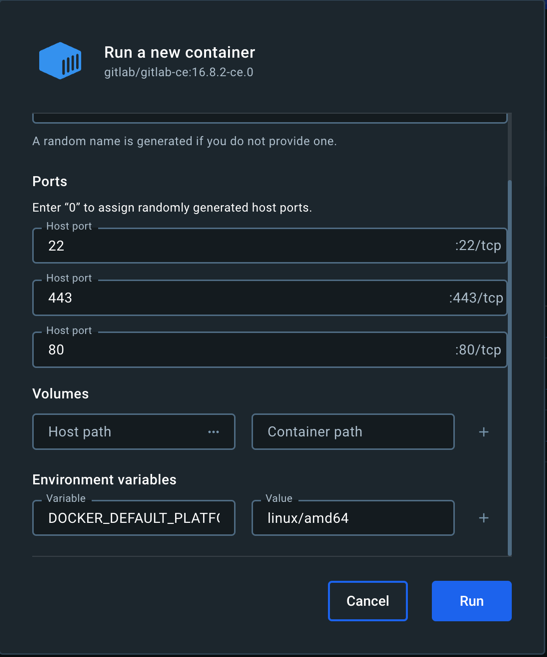
The easiest way to create a container is to click the ‘play’ button in the Actions column of our new image. This will display a dialog where the container setting, including the above environment variables, can be set.
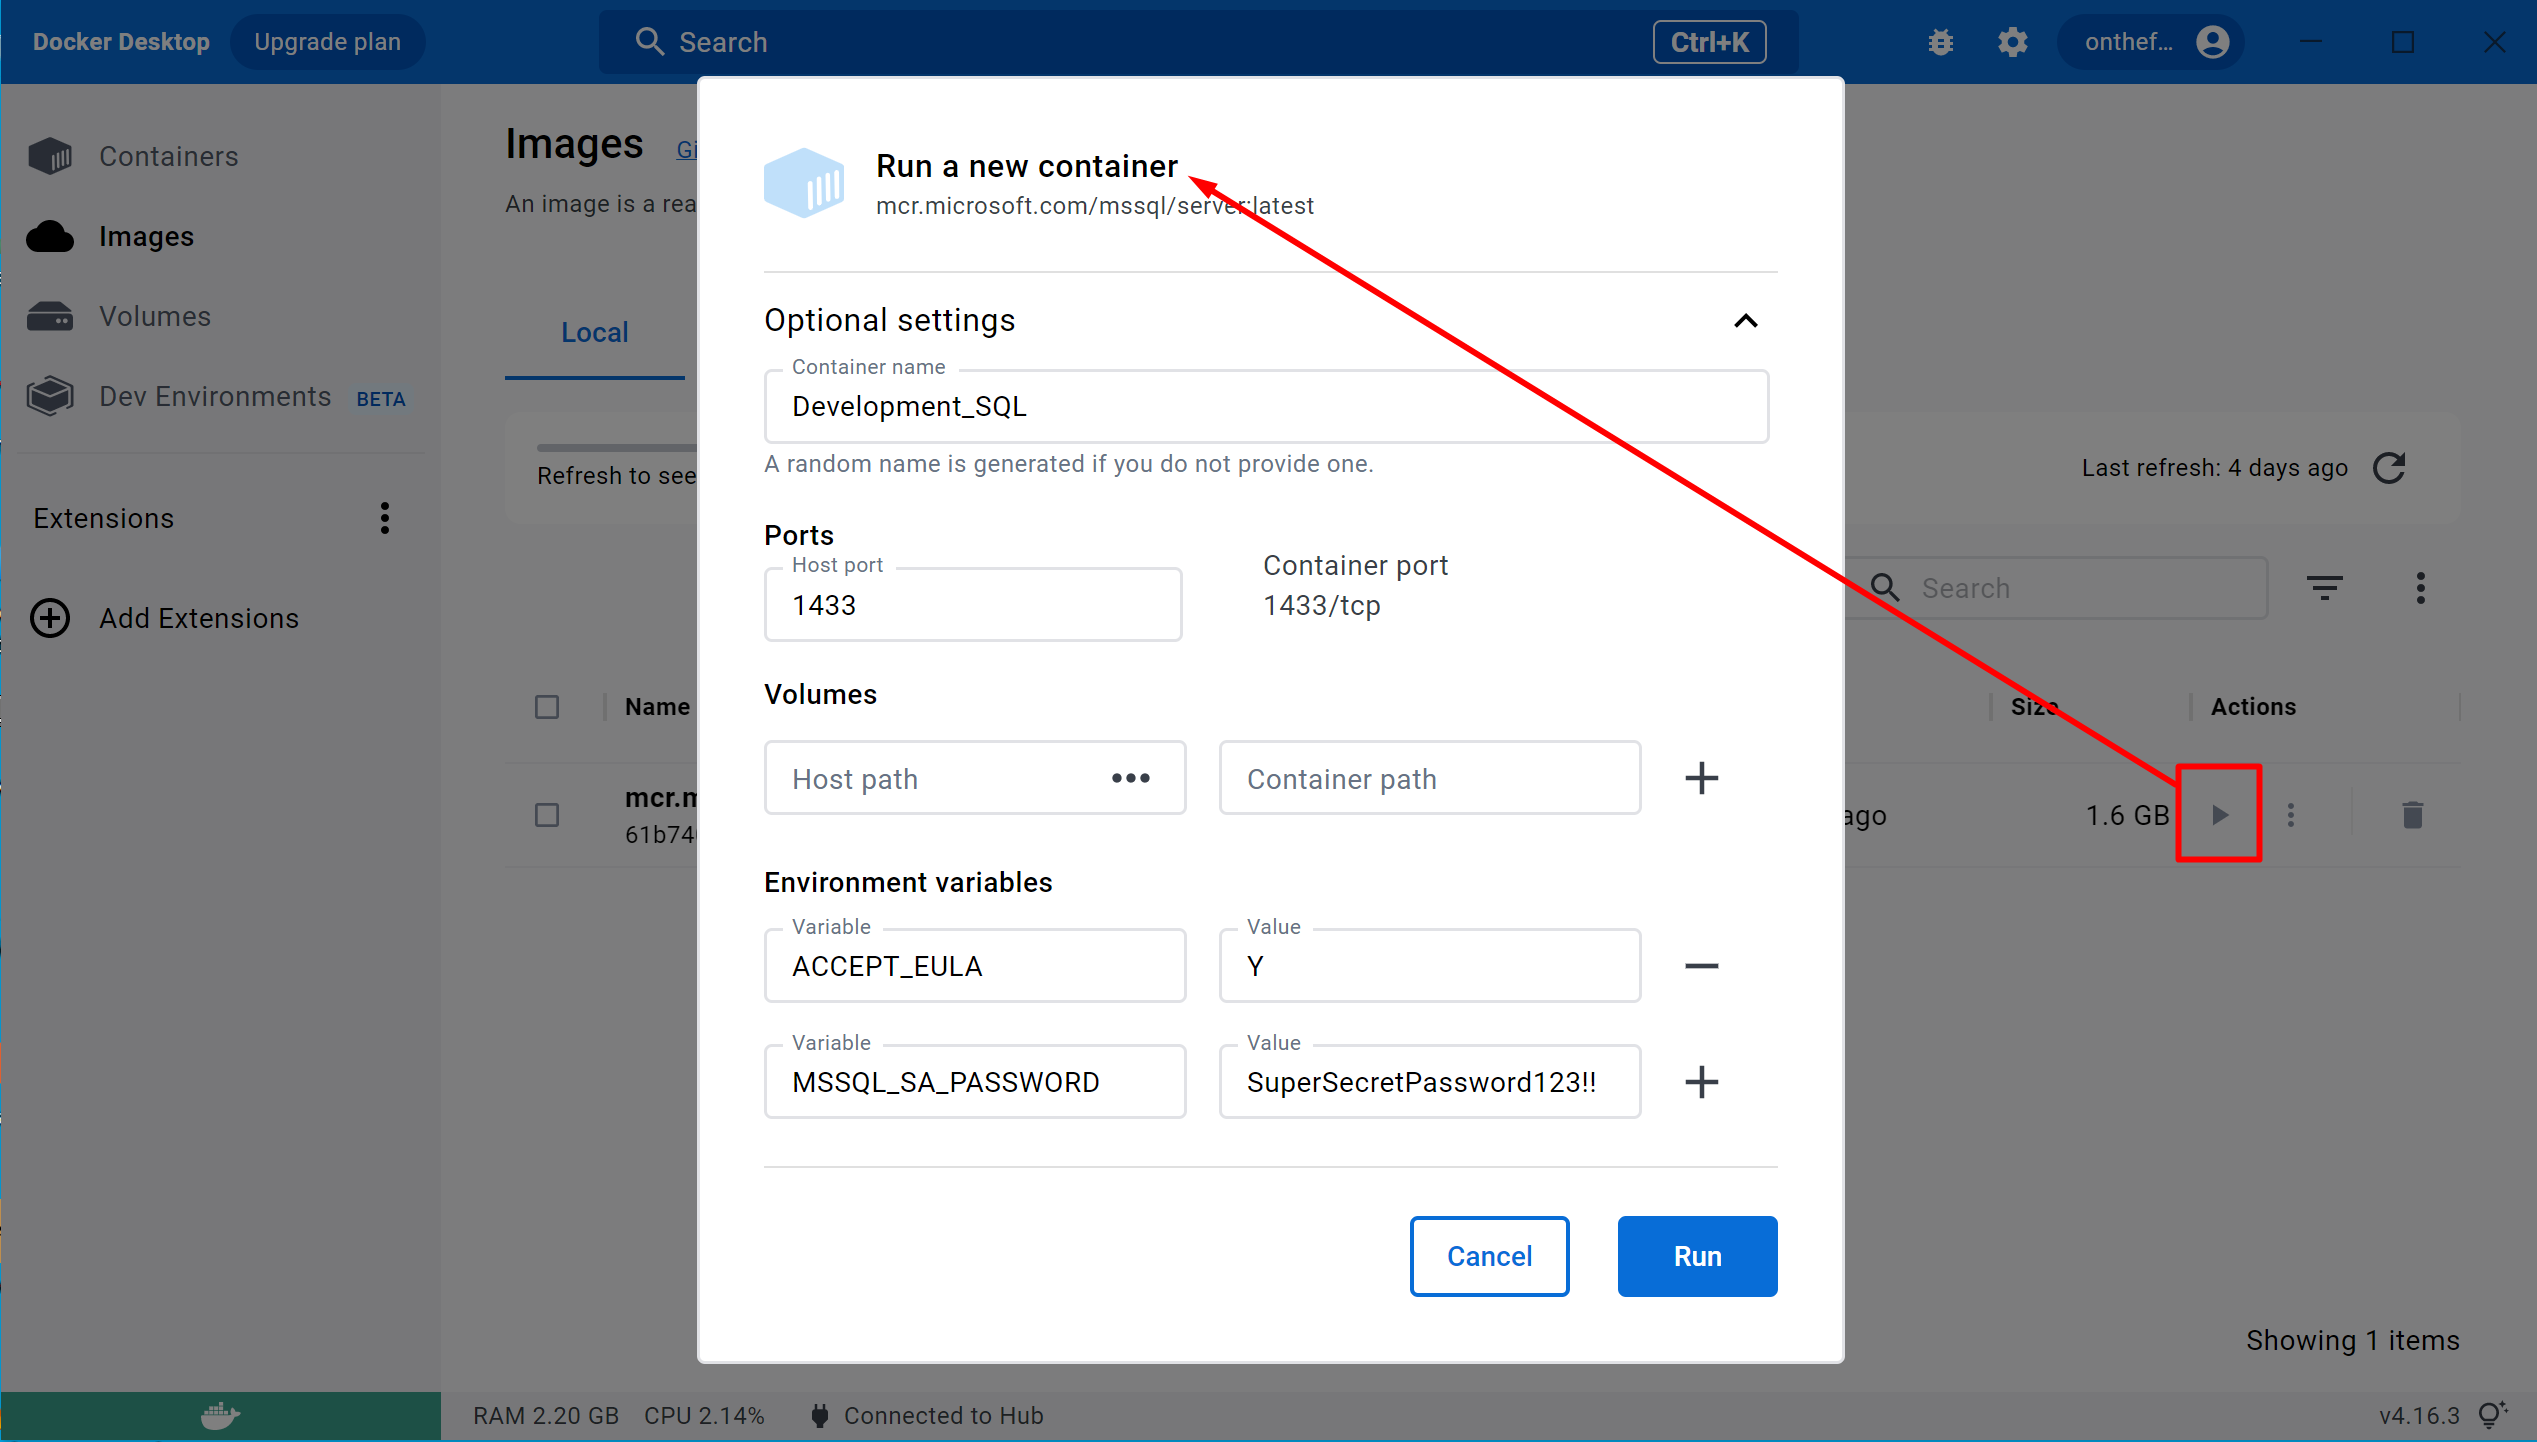
Ignoring Volumes for now I entered a suitable name for the container along with a Host Port value of 1433 (a direct mapping to the default SQL Server port exposed by the container) and set the environment variables above.
Finally, clicking the Run button creates and starts the new container.
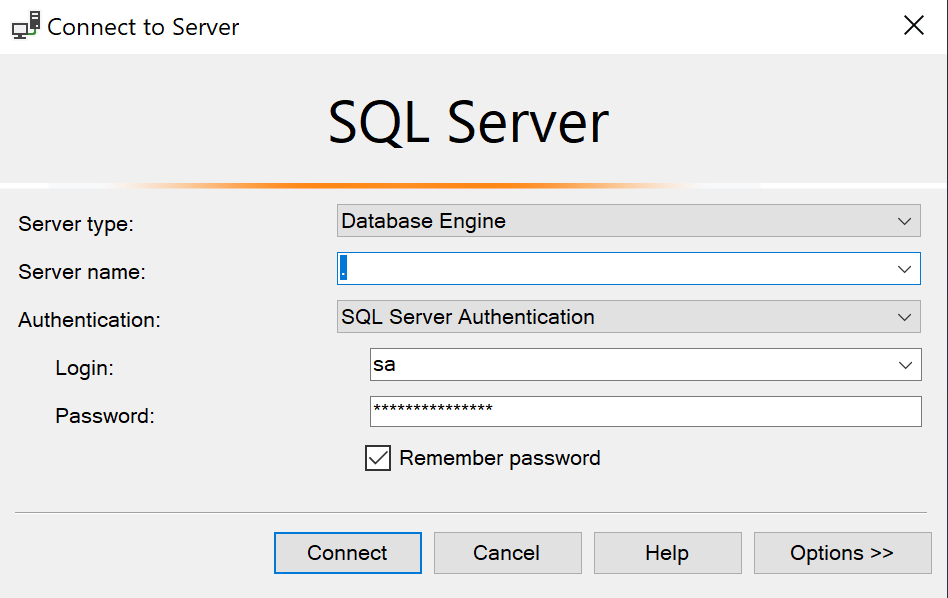
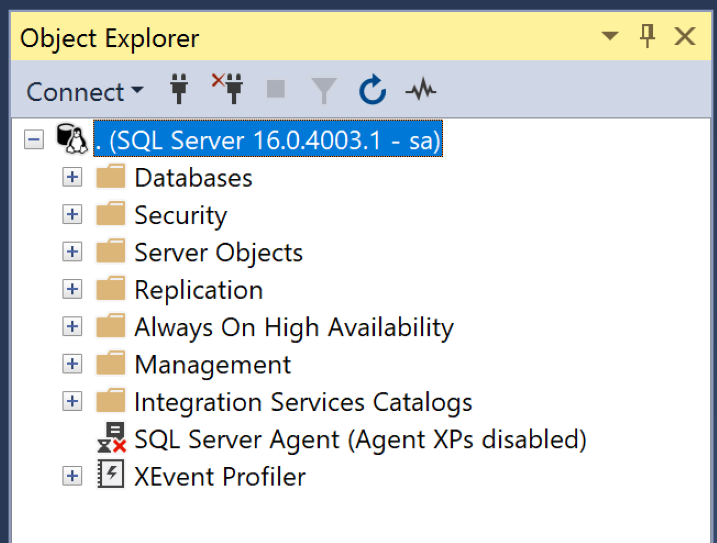
On Windows I can open SQL Server Management Studio and connect to the SQL Server instance running in the container just like any other.
I can now create databases, adding tables, inserting, updating and selecting data as normal - but there is a ‘problem’, if it can be called that.
The container is self contained and while data it contains will survive it being stopped and restarted, it will (maybe obviously) be lost if the container itself is deleted.
This may not be an issue, in fact it may be a good thing in certain circumstances, but there are plenty of reasons to be able to save the database files outside of the container and allow the container to access database backup files saved on the host systems filesystem.
This is where Volumes come in.
Volumes allow file locations within the container to be linked to a file location on the host systems filesystem.
For the purposes of my development environment I want to be able to define a location to hold backups (.bak files) and another to hold the data and log files (.mdf and .ldf files).
I started by creating a ‘ContainerVolumes’ folder with ‘SQL_Data’ and ‘SQL_Backups’ folders within it. With this in place I can now spin up a new container with the appropirate volume configurations in place. I could add the volume to the container I created above but containers like this are essentially disposable so I don’t really see the need.
Before I can configure the volumes I need to know where within the containers filesystem I need to hook my ‘ContainerVolumes’ folders to. So, taking into account that the SQL Image I’ve pulled from Microsoft is based on the Ubuntu flavour of Linux I can’t just assume it will be the same locations as a Windows SQL instance.
As it happens it’s really not that difficult and while Linux gurus out there will roll their eyes at my approach, I’m all in favour of experiment and observation - and I can use the container above to work it out.
If I wanted to restore a database from a backup using SSMS it would, by default, expect it to be within the instances ‘Backups’ folder buried deep in the Windows filesystem. Attempting to kick off a restore while connected to my container opens the following path /var/opt/mssql/data which isn’t what I expected. It does however give me a place to start, and a hint as to where I should expect the database files to end up.
Looking a little futher up in the filesystem I located /var/backups which marries up a little better with it’s Windows equivalent so I opted for that one for my backups.
To confirm that the instance will store it’s database files in /var/opt/mssql/data I just used Docker Desktops built-in terminal, accessed via the Terminal tab on each Containers details.
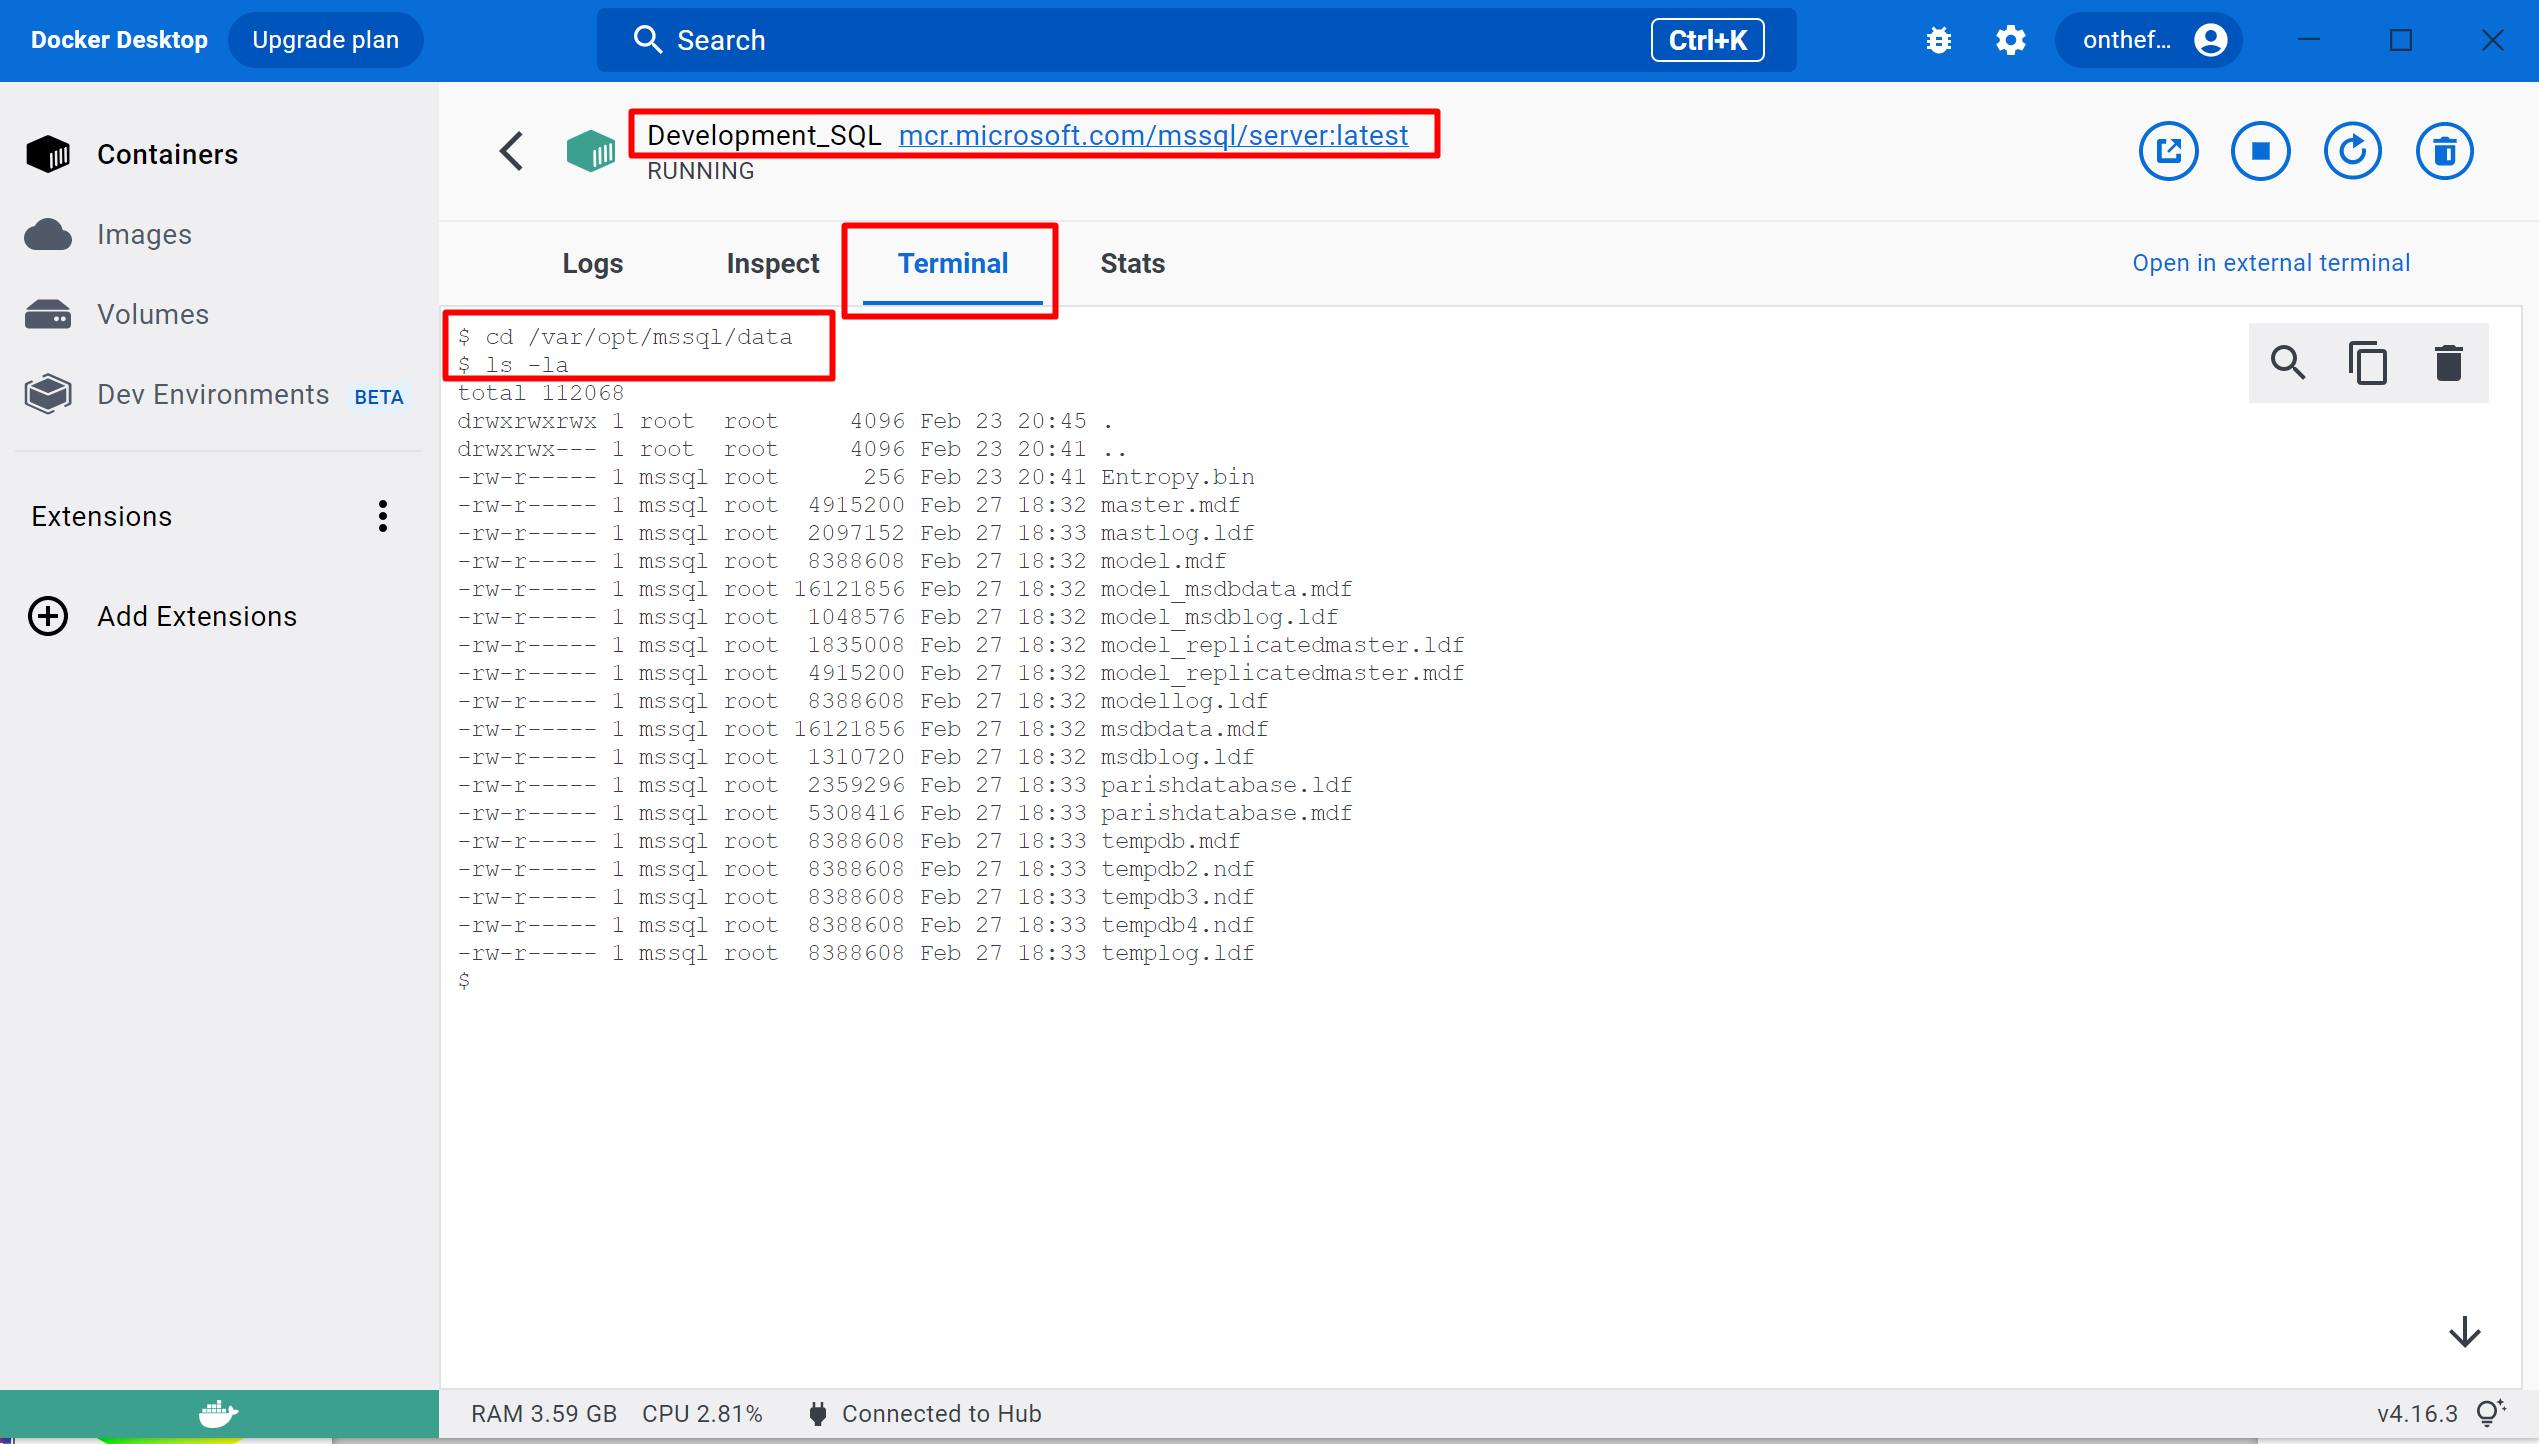
Running a couple of basic Linux commands to move into the /var/opt/mssql/data directory and list it’s contents I could see a number of .mdf and ldf files relating to the master and model databases.
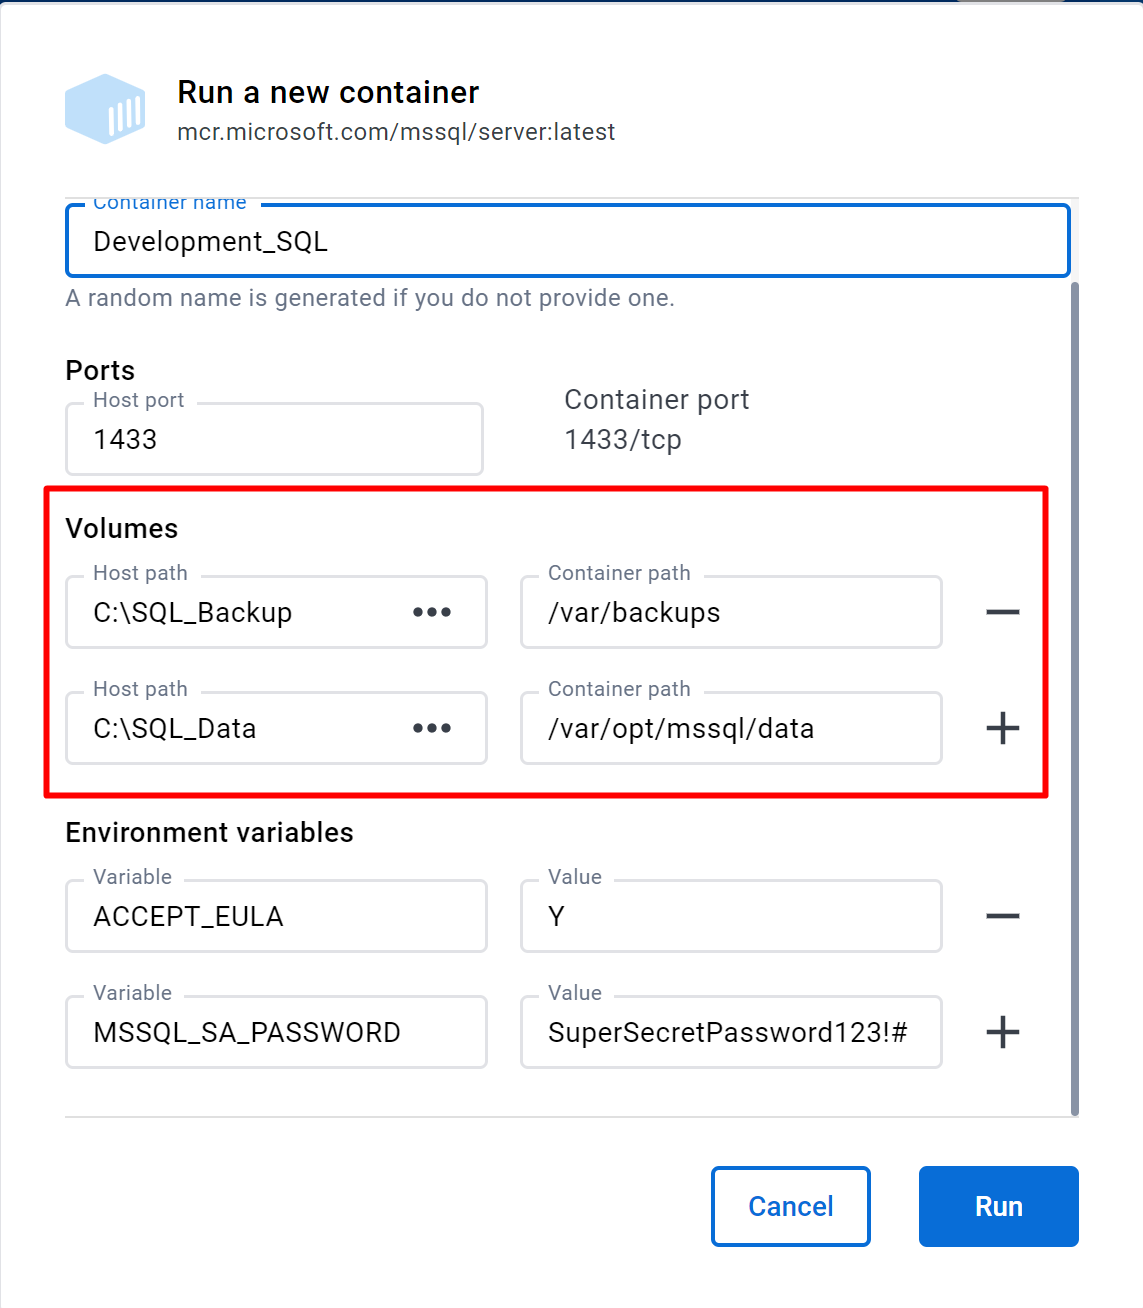
So, now that I know what needs to be mapped and to where I can click the ‘play’ button next to the SQL image, configure it in the same way as before, but this time I can include my Volume mappings.
Now I can drop a regular SQL .bak backup file into my ContainerVolumes/SQL_Backups folder, trigger the Restore process within SSMS, select the /var/backups folder and finally select the .bak file I’d placed there.
I can also create databases within the container with the .mdf and .ldf datafiles being saved to the ContainerVolumes/SQL_Data folder.
Now I don’t have numerous versions of SQL Server chewing up hard drive space or CPU cycles for that matter as they were all running instances! I have reclaimed around 15GB on my primary drive and have the flexibility to spin up/down different SQL versions as required.
]]>