
Dynamic AppShell Items in MAUI
mobile-development maui dotnet I’m currently working on a handful of Xamarin to MAUI migration projects with most of them using the AppShell navigation framework built-in to Xamarin.Forms - something I previously found a little clunky.
I’m sure most phone users are familiar with the concept of the AppShell even if they don’t know it, but basically it provides a slide out menu along with the good old ‘hamburger’ button and swipe gestures to open and close it. With the menu open a number of menu items are presented for the user to select to navigate around the app and/or invoke operations such as logging in or out.
And therein lies the rub for both Xamarin and MAUI as out of the box the AppShell doesn’t appear to provide an obvious, clean mechanism to dynamically show or hide items based on state within the app, e.g. whether a user is logged in or not so that the appropriate menu options can be displayed.
The existing applications I’m working with had gotten around this shortcoming in slightly different ways which involved some form of ‘Global State’ class or methods being added to the App.xaml.cs class which required various ugly casts dotted around the app to call them. Surely there had to be a better way than this.
I decided that I wanted to implement something a little cleaner and more consistent for these apps and going forward. After a good amount of internet searching there didn’t seem to be anything obvious I was missing within MAUI but there were some throwaway comments such as ‘just use multiple AppShells’ or ‘just use MVVM’ which wasn’t overly helpful but got me thinking.
Having multiple AppShells and swapping them out as required didn’t smell right to me but as I’d already opted to use the MAUI Community Toolkit MVVM library to streamline the development for these apps I was already in a good starting point to investigate this option.
Before we start lets take a quick review of the startup process of a MAUI app by looking at a vanilla configuration from a File > New Project operation.
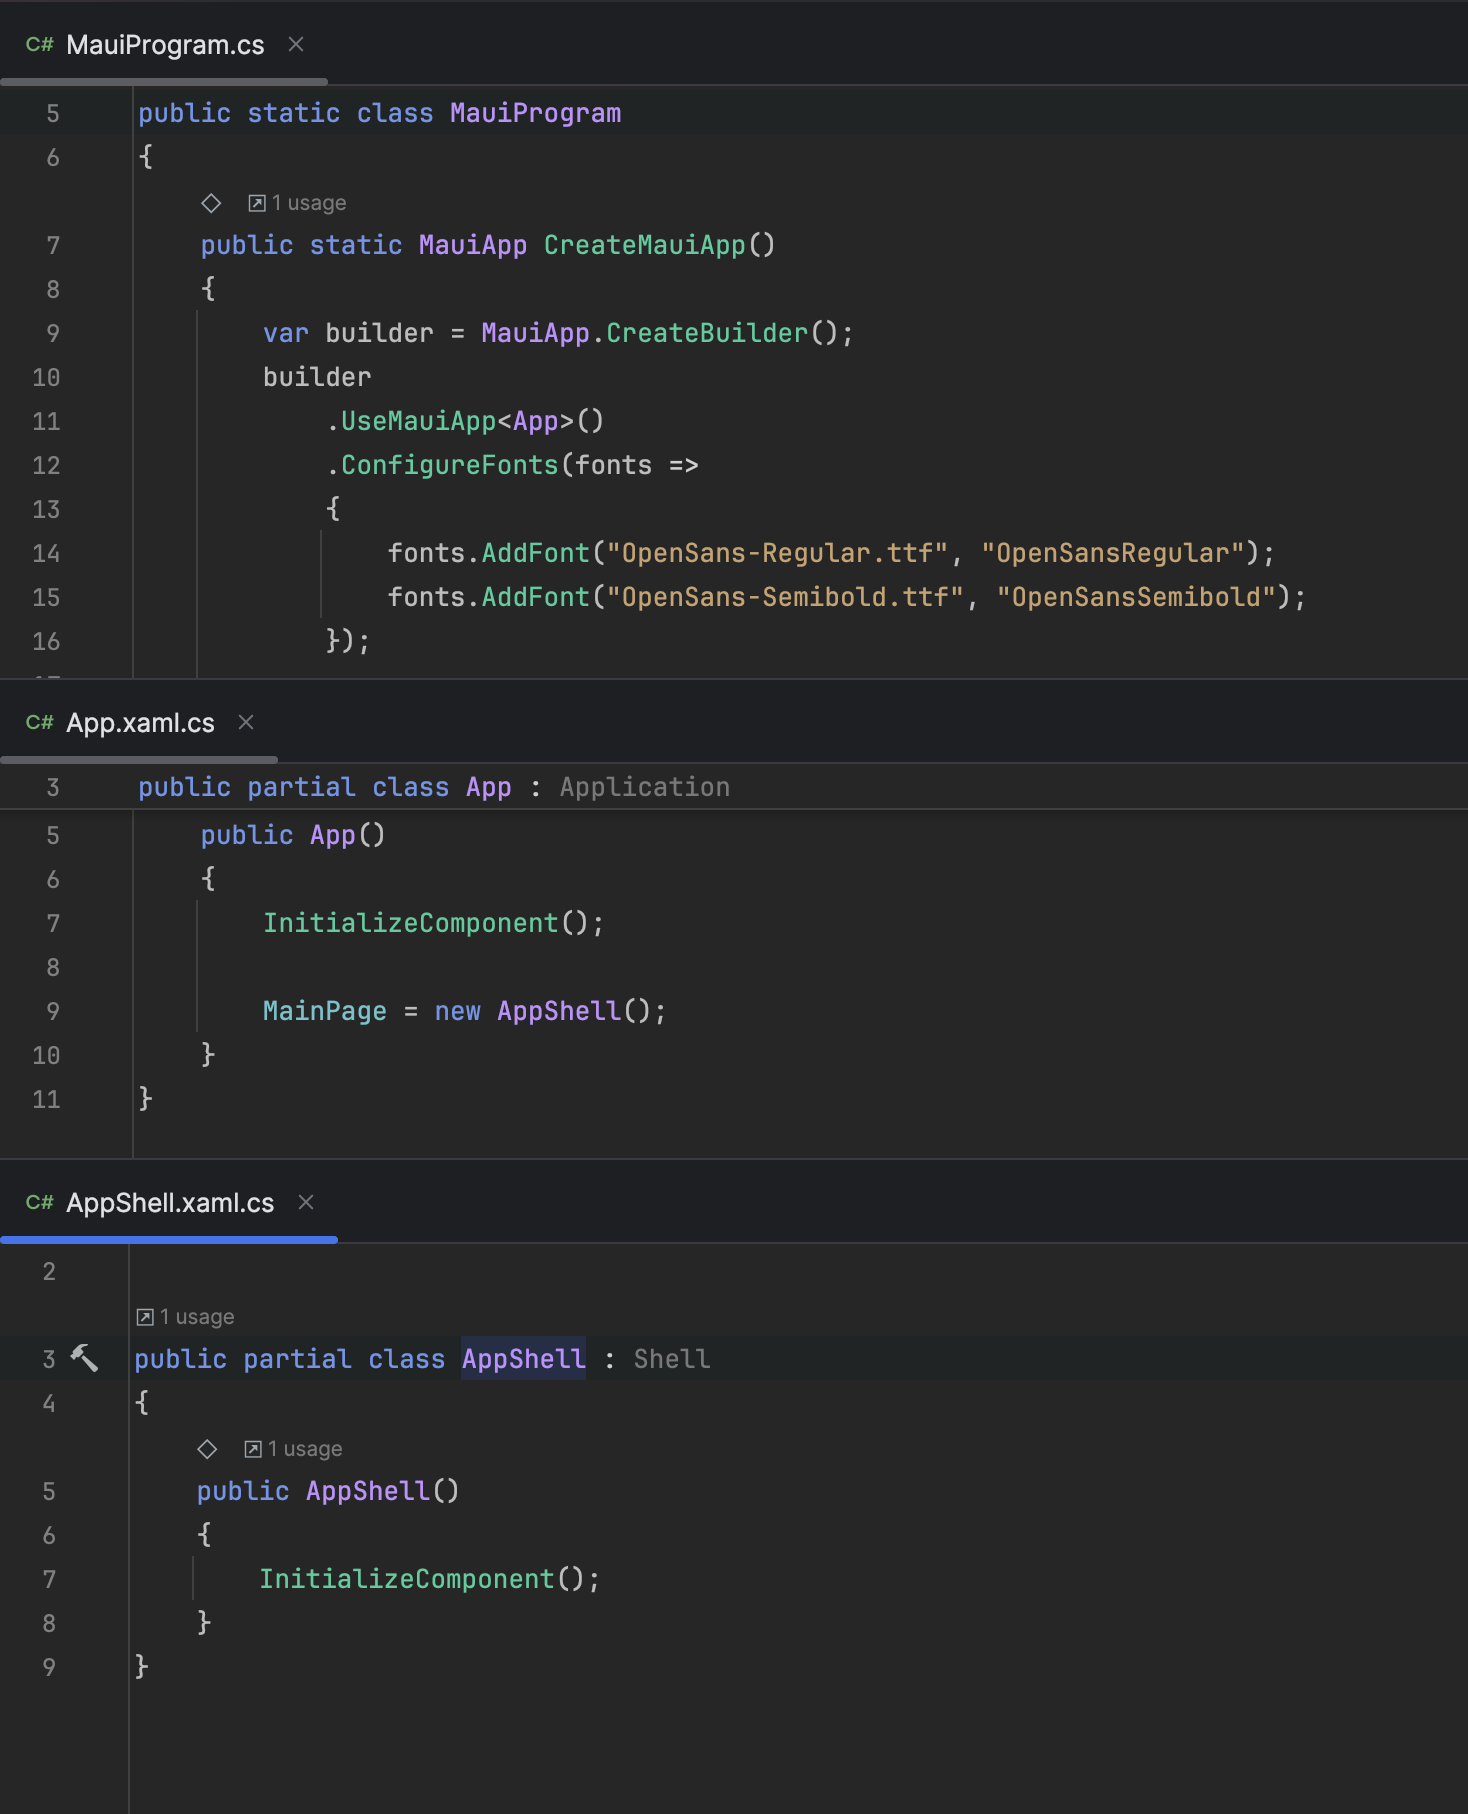
The entry point of a MAUI app, is the MauiApplication.cs class (the top one in the above image) which makes a reference to App.xaml.cs (the middle one) which in turn calls out to AppShell.xaml.cs (obviously, the bottom one).
Ideally we want to be able to bind items in the AppShell.xaml view so that we can control their visibility, or whatever other properties we want/need to. This can be achieved throughout the rest of the app using View Models registered with the Dependency Service but the AppShell is being instantiated directly in the App.xaml.cs via a parameterless constructor so how do we get a View Model in there?
Well, the answer is to inject it into App.xaml.cs instead and then pass it into AppShell.xaml.cs by adding a suitable parameter to the existing constructor. If we also register the View Model as a Singleton then it can be injected throughout the app carrying its state around with it and allowing interaction with the bound elements of the AppShell.
I’ve created a working project to demonstrate this, which can be downloaded from the Resources section at the bottom of this post, but here is an overview of what’s required.
Project Setup
The project is a standard File > New Project > MAUI Application with some additional Pages and View Models. It also has the CommunityToolkit.Mvvm and CommunityToolkit.Maui NuGet packages installed. These are not strictly speaking required but the solution relies on MVVM and while other options are available, including manual implementation of INotifyPropertyChanged etc this is the router I’ve chosen.
Once the packages are installed the first thing to do is enable the AppShell menu as the vanilla code has disabled it by default.
The first thing we need to di is open the AppShell.xaml file and locate the line that sets the FlyoutBehaviour which will probably have the value Disabled. Change this setting to Flyout.
<Shell


    Shell.FlyoutBehavior="Flyout">
</Shell>
View Model Setup
First, create a new class called AppShellViewModel.cs wherever your other View Models will reside.
Next we need to register this with the Dependency Injection Container so open MauiProgram.cs and register the View Model as a Singleton as below;
    public static MauiApp CreateMauiApp()
    {
        var builder = MauiApp.CreateBuilder();
        builder
            .UseMauiApp<App>()
            .UseMauiCommunityToolkit()
            .ConfigureFonts(fonts =>
            {
                fonts.AddFont("OpenSans-Regular.ttf", "OpenSansRegular");
                fonts.AddFont("OpenSans-Semibold.ttf", "OpenSansSemibold");
            });

        builder.Services.AddSingleton<AppShellViewModel>();

        return builder.Build();
    }
Registering the View Model as a Singleton means that there will only ever be a single instance of it while the app is running. This means that if the AppShellViewModel is injected into another View Model which acts on a property bound to the AppShell view, that change will be reflected there.
Now we need to update App.xaml.cs by adding a parameter for the new View Model which will now be injected at startup. We also need to update the instantiation of the AppShell
    public App(AppShellViewModel appShellViewModel)   // New Parameter to received injected ViewModel
    {
        InitializeComponent();
        MainPage = new AppShell(appShellViewModel);  // Instantiate AppShell with injected ViewModel instance
    }
So we now have a Singleton instance of the AppShellViewModel successfully ‘injected’ into the AppShell that we can bind to UI elements on the AppShell view itself - once we’ve added some properties to bind to of course, so let’s do that next.
AppShell View and Bindings
The AppShellViewModel is going to be doing all the heavy lifting here but with the Community Toolkit for MVVM installed the code is quite minimal as you’ll see from the sample app. Below is an example of a boolean property which can be bound to a menu item and control its visibility.
public partial class AppShellViewModel : ObservableObject
{
    [ObservableProperty]
    private bool _isLoggedIn;
}
With that property in place we can add some UI elements to the AppShell and bind them to it. In the sample app I have added a Login and a Logout button which obviously shouldn’t be displayed at the same time. These have been bound to the IsLoggedIn property generated by the Community Toolkit along with a Property Converter to flip the boolean value so that only one is ever displayed.
<Shell
    x:Class="Maui.DynamicShell.AppShell"
    xmlns="http://schemas.microsoft.com/dotnet/2021/maui"
    xmlns:x="http://schemas.microsoft.com/winfx/2009/xaml"
    xmlns:local="clr-namespace:Maui.DynamicShell"
    xmlns:toolkit="http://schemas.microsoft.com/dotnet/2022/maui/toolkit"
    Shell.FlyoutBehavior="Flyout"
    x:DataType="local:AppShellViewModel"
    Title="Dynamic Shell Demo">
    <Shell.Resources>
        <ResourceDictionary>
            <toolkit:InvertedBoolConverter x:Key="InvertedBoolConverter" />
        </ResourceDictionary>
    </Shell.Resources>

    <ShellContent
        Title="Home"
        ContentTemplate="{DataTemplate local:MainPage}"
        Route="MainPage" />

    <Shell.FlyoutContent>
        <StackLayout Margin="20,20,20,0" Grid.Row="1" Spacing="15">
            <Button IsVisible="{Binding IsLoggedIn, Converter={StaticResource InvertedBoolConverter}}" Text="Login" Command="{Binding LoginCommand}" />
            <Button IsVisible="{Binding IsLoggedIn}" Text="Logout" Command="{Binding LogoutCommand}" />
        </StackLayout>
    </Shell.FlyoutContent>
</Shell>
Making it Work
So lets review what we’ve done here
- Created a View Model and registered it as a Singleton with Dependency Service (this Singleton bit is important)
- Updated
App.xaml.csto allow the Singleton instance of the View Model to be injected and passed toAppShell.xaml.cs - Updated
AppShell.xaml.csto allow the Singleton instance of the View Model to be passed in via a regular parameter - Added an Observable Property to the View Model and bound it to a couple of buttons on the
AppShell.xamlview
Now consider a Login page which has a LoginViewModel with a LoginCommand where we want to hide the Login button when the Login was successful and for the Logout button to be displayed instead.
All we need to do is to update the LoginViewModel to allow the AppShellViewModel to be injected as below;
    private readonly AppShellViewModel _appShellViewModel;

    public LoginViewModel(AppShellViewModel appShellViewModel)
    {
        _appShellViewModel = appShellViewModel;
    }
We can now update the LoginCommand to update the IsLoggedIn property of the AppShellViewModel, setting it to true to cause the Login button to be hidden and the Logout button to be displayed
    [RelayCommand]
    private async Task Login()
    {
        .
        .
        .
        if(loginSuccessful) {
            _appShellViewModel.IsLoggedIn = true;
            await Shell.Current.GoToAsync($"//{nameof(MainPage)}");
        }
    }
In the example application I’ve added a LogoutCommand to the AppShellViewModel which sets IsLoggedIn to false, hiding the Logout button and displaying the Login button.
I’ve also added a handful of other Views and ViewModels to provide a bit more of a rounded example, but they are obviously not required for the example to work.
If you run the sample app in Android you will be able to open the menu and select either one of the ‘regular pages’ and return to the main page by clicking the ‘Back’ button on the device or the back arrow to the top left of the view. Clicking the ‘Login’ option will open a page with a single ‘Login’ button - before clicking it, notice that the back arrow has been replaced with the hamburger menu so you can open the menu and verify that the ‘Login’ option is still displayed. Clicking the ‘Login’ button will take you back to the main page of the app and if you open the menu you will see that the ‘Login’ option is now hidden and that the ‘Logout’ option is displayed in its place. Clicking the ‘Logout’ option won’t appear to do anything but opening the menu will show that the ‘Login’ option is once again displayed.
So there it is, a simple and clean solution to enable you to interact with the AppShell menu from anywhere in your app.
I hope you find it useful.
Resources
Sample Application: Download
Comments
Comments are now closed0 responses