
Apple Certs and Profiles – without a Mac
development devops mobile-development utilities xamarin While I have used Windows 10 for the screenshots etc I am reliably informed that the process also works for Windows 11
 I think we will all agree that the annual chore of regenerating signing certificates and provisioning profiles for our iOS project is just that – a chore. Not only do we have to remember the dance that we performed the year before but also need to dust off the Mac Mini and hope it boots.
But why a Mac Mini? Why are we tied to using Apple hardware to generate our certificate signing request and to export the resulting certificate in the correct format?
Well, as it turns out ….. we don’t, we can in fact use Windows 10 using built in tooling.
Generating a Certificate Request (aka CSR)
If you were using a Mac you would open the Keychain to create your CSR, in Windows 10 you can use the Certificate Manager to do the same thing.
» Enter ‘certificates’ into the taskbar search box and select the ‘Manage computer certificates’ option

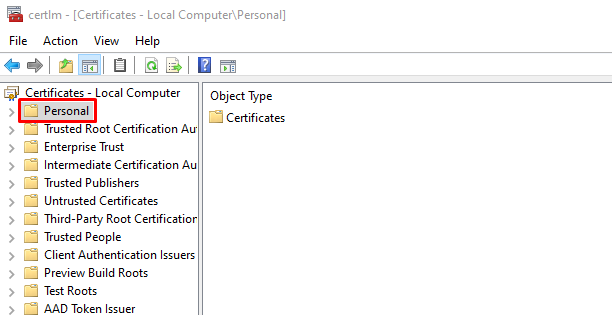
» Next select the Personal folder
» Then select Action > All Tasks > Advanced Operations > Create Custom Request from the main menu and click Next to skip the Welcome page
Select Certificate Enrollment Policy
» Ensure Proceed without enrollment policy is selected
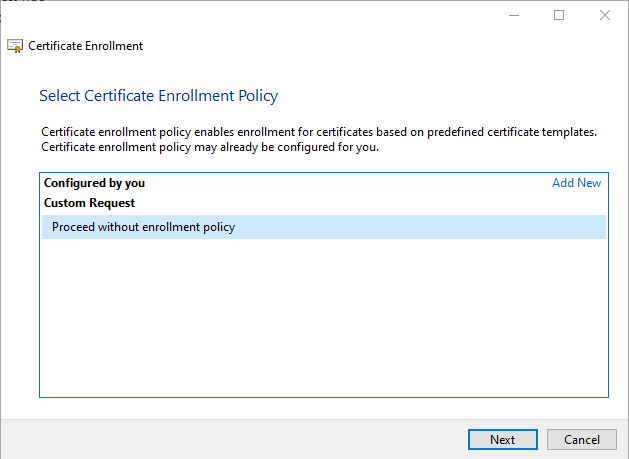
» Click Next
Custom Request
» Set the template as No Template and ensure the Request format is PKCS #10
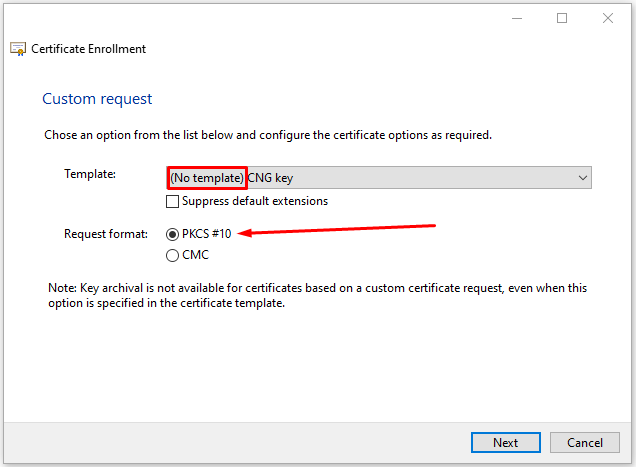
» Click Next
Certificate Information
» Click the Details expander and then properties
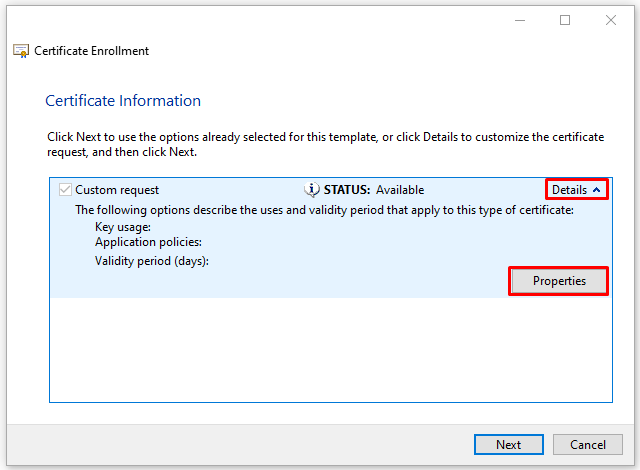
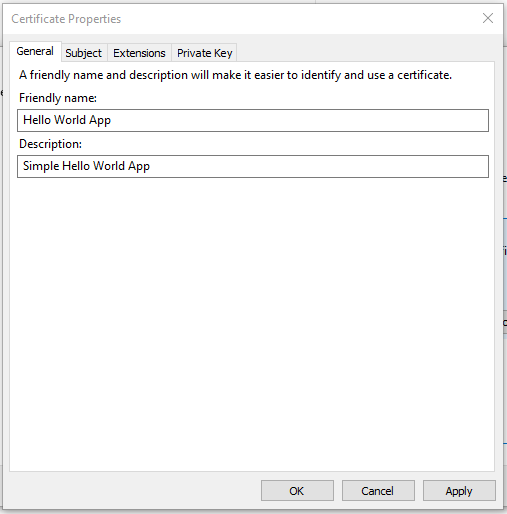
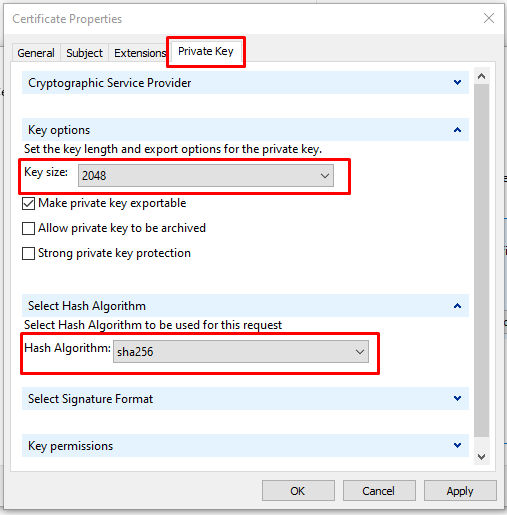
Certificate Properties
» On the General tab enter a Friendly Name and Description (not sure where this is used in the process)
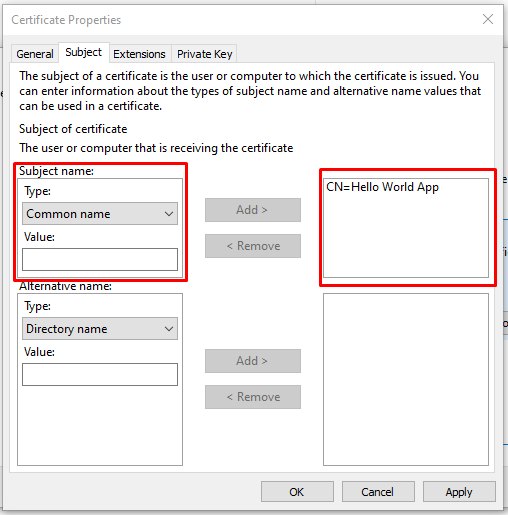
» On the Subject tab within the Subject Name panel, select the Common Name item from the Type dropdown, enter a Value and click Add to include the parameter
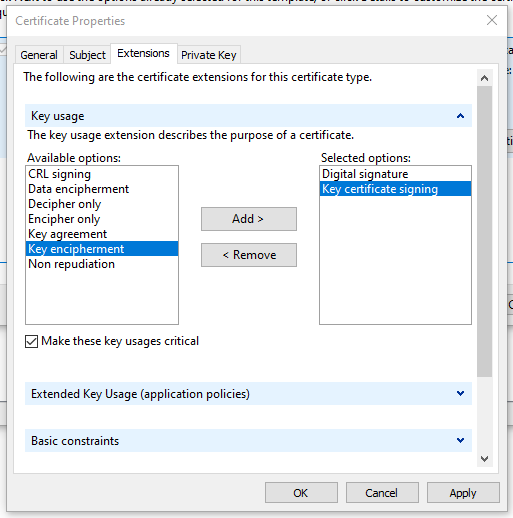
» On the Extensions tab expand the Key Usage section then Select and Add the following items:
- Digital Signature
- Key Certificate Signing
» On the Private Key tab expand the Key Options section and set the Key Size to 2048. Also tick the Make private key exportable option
» Still on the Private Key tab, expand the Select Hash Algorithm and select sha256
» Click OK to commit these changes then click Next
Save Certificate
» Finally enter a suitable filename and leave hte file format set to Base 64.
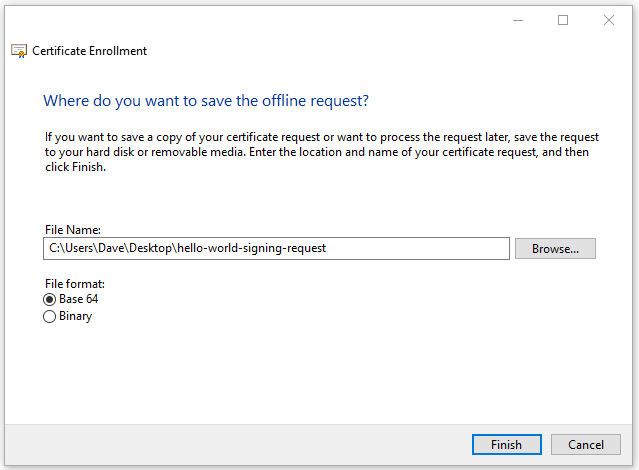
» Click Finish
This CSR can now be used to generate the certificate on the Apple Developer portal and create a corresponding Provisioning Profile.
Once you have done so, download both to your local PC.
While the Provisioning Profile is ready to use we need to convert the .cer file that we downloaded into a .p12 file that can be used by systems like DevOps and AppCenter.
Importing your Apple Certificate
» Back in the Windows Certificate Manager and with the Personal folder selected select Action > All Tasks > Import from the main men then click Next to skip the Welcome screen.
File to Import
» Click the Browse button to locate and select your downloaded certificate
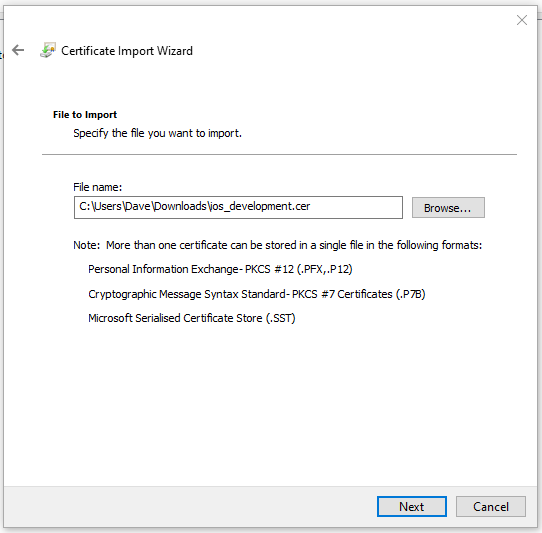
» Click Next
Certificate Store
» Confirm the target location of certificate as Personal
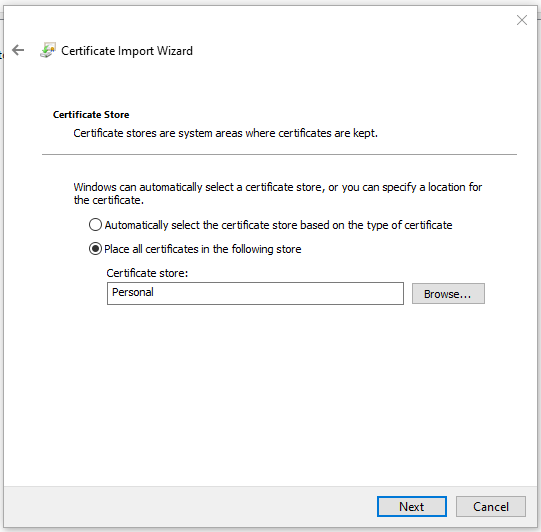
» Click Next then Finish to complete the import
If you now select the Certificates folder within Personal you should see the shiny new certificate

Right, now they we have imported it … we need to export it again so that we can use it 😉
Exporting the P12 Certificate
» With the new certificate selected select Action > All Tasks > Export from the main menu and click Next to get past the Welcome screen
Export Private Key
» Select Yes, export the private key option

» Click Next
Export File Format
My system only seems to allow me to export as PKCS #12 format (which is lucky as that’s what we need) and I select the following options:
- Export all extended properties
- Enable certificate privacy
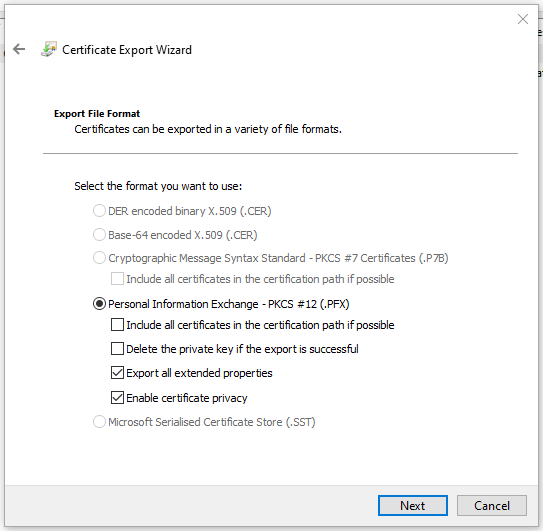
» Click Next
Security
» Tick the Password checkbox then type and repeat your password and select TripleDES-SHA1 as the Encryption method (yes, this seems to fly in the face of the sha256 value we specified in the CSR but if you pick AES256-SHA256 option we will probably get an error when you try to use build your app).
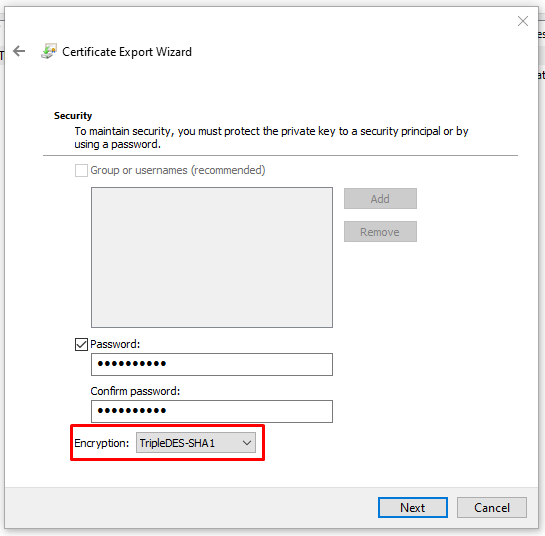
» Click Next
File to Export
» Use the Browse button to select your desired output location and filename, then click Next
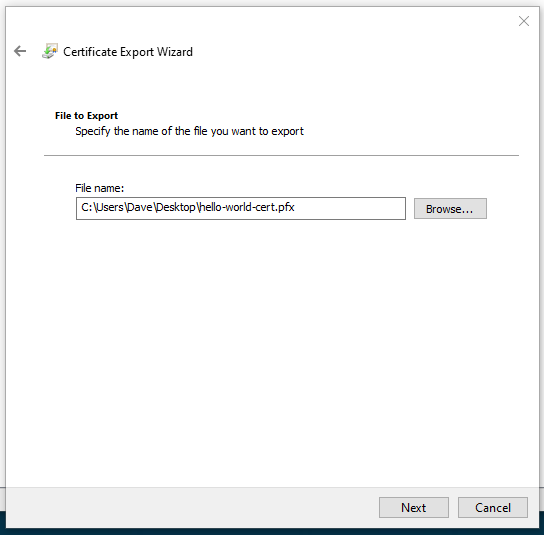
» Finally click Finish to complete the export process
Note that the saved file has a .pfx extension which most systems won’t accept – despite the file being perfectly valid so you will need to change this to .p12 and you are done.
Using your newly exported .p12 certificate and your provisioning profile you can now sign your iOS builds using DevOps or AppCenter – all withough a Mac in sight.
Comments
Comments are now closed0 responses