
Getting Started with Visual Studio 2019 Android Navigation Drawer template
xamarin mobile-development development 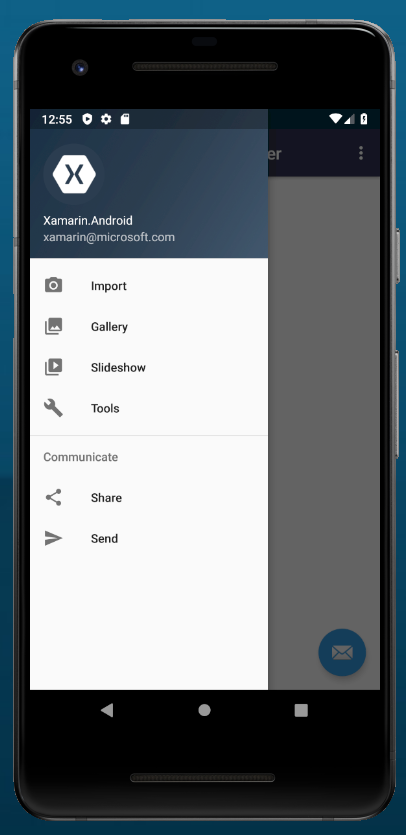 So, I’ve had an idea for another privacy-focused application, this time aimed at mobile devices – Android in particular (I know that Apple are a little touchy about encryption apps – maybe I’ll venture into iOS at a later date).
Notwithstanding my desire to keep my skills up to date I knew that the project I have in mind would require a lot of platform specific logic. While Xamarin Forms can handle this I prefer to take the hit, roll my sleeves up and I opted for a native Android project instead – and that’s where the trouble/fun started.
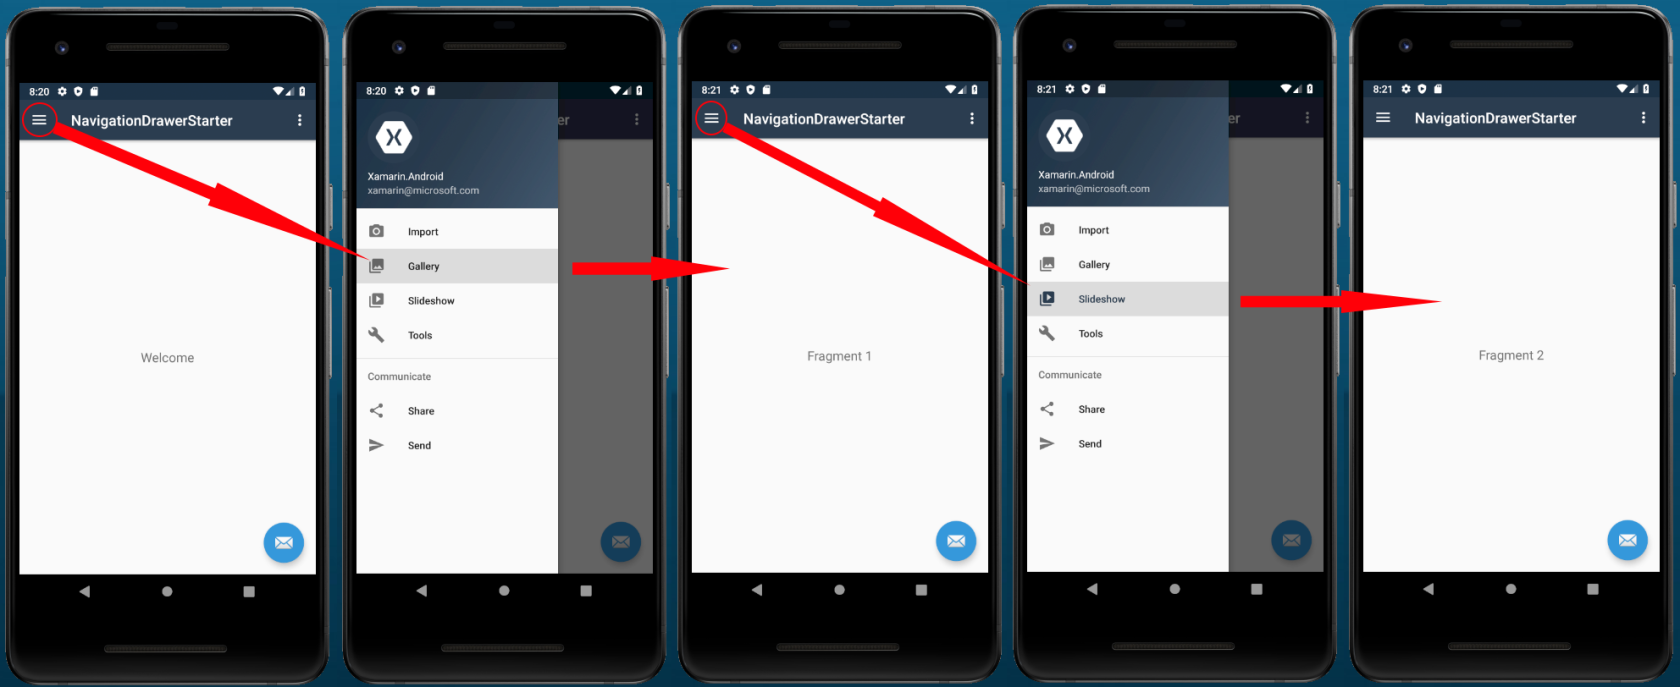
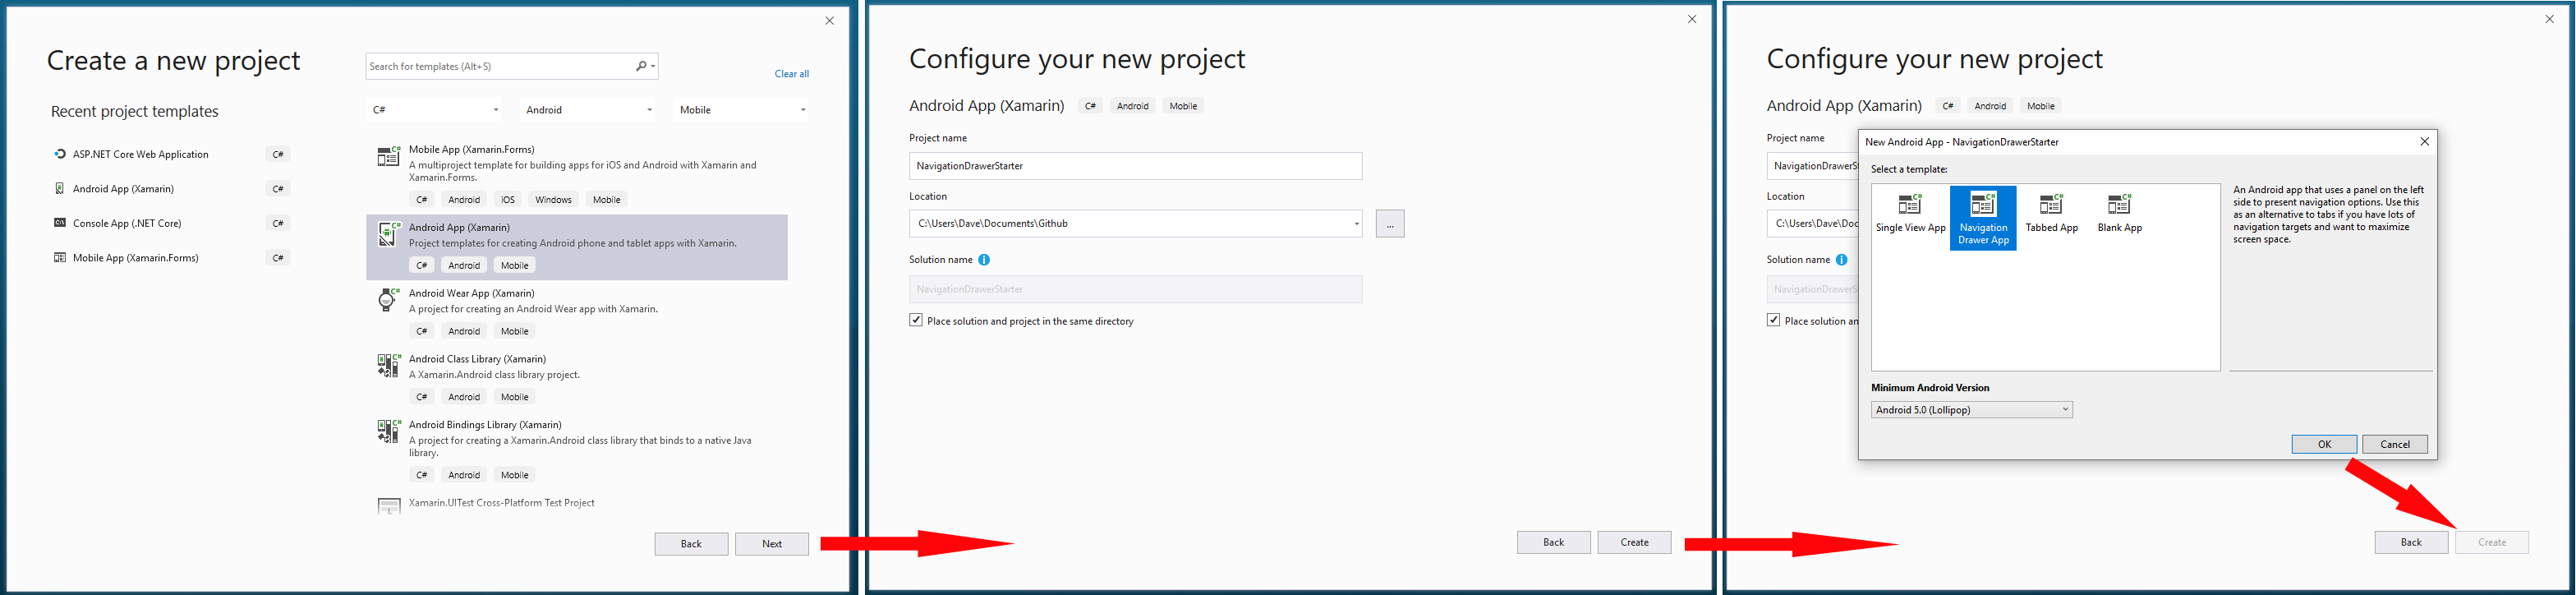 If you go through the ‘New Project’ process below you will end up with an application which will look something like the one above;
Yep -just what I needed, an application with a slide out menu. Now all I need to do is to replace the default options with my own and then open the appropriate views when they are clicked – what could be easier?
Well, when you venture into the code you will find the following event handler within the MainActivity class:
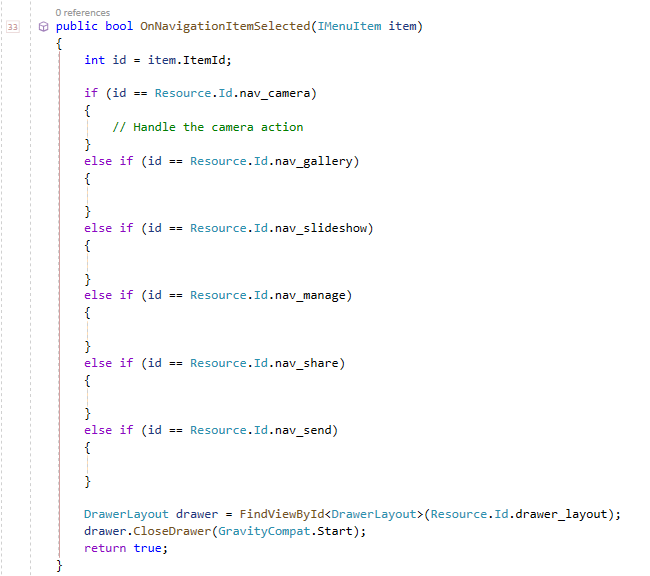
Hmm – so no actual code in place for when an option is selected then!? Running the app and selection various options confirms this is the case. So how hard can it be … really?
In the past I’ve used the Xamarin Forms Drawer Navigation model to create this sort of interface so was a little out of touch with the way native Android was doing things. I knew that I was probably looking at using Fragments, rather than Activities, to act as the content views but had never really used them.
Fragment is Obsolete – eh, what?
I know enough about Fragments to know that I needed a Fragment class and an associated Layout file (the view if you like).
I created a Fragments folder and, using the Add > New Item option, added a Fragment class.
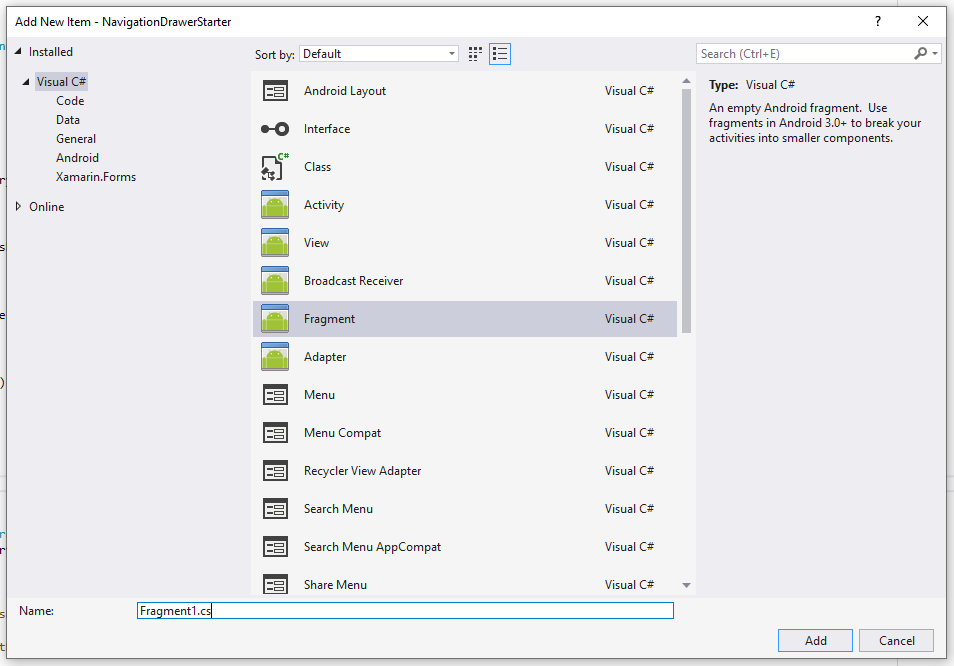
The class was duly created and Visual Studio displayed a green squiggly under the Fragment base class reference. No, big deal – we’ve all seen this before, probably nothing too worrying;
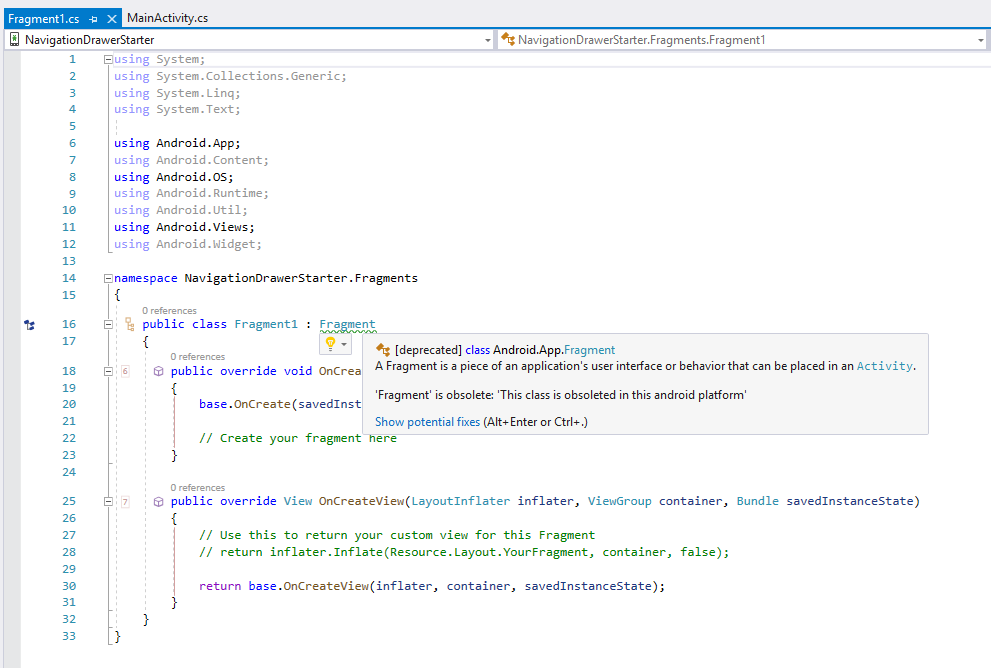
Oh! It would appear that Fragment is deprecated – what the what?
This was rabbit hole number 1 – if Fragment is deprecated what do I use instead?
After a couple of hours trawling the Internet and generally getting frustrated I began to piece together fragments of information (pun intended) which led me to a solution, actually a couple of them.
- Drop the ‘Compile Target’ from 9.0 (Pie) to 8.1 (Oreo) where the Fragment class is not marked as obsolete.
- Reference the Support Library implementation of the Fragment class instead
Right, option 1 isn’t really an option unless you are happy to tether your application to Oreo. This may be fine for say a proof of concept but not really for a production application. An app compiled against Oreo should run fine on Pie and above – but your mileage may vary so make you you check that out!
Option 2 should not have come as a surprise to you or anyone else familiar with Android development – very few apps these days can be written without using the Support Libraries.
The complication came because when you search the Internet for information on the Android Support Libraries you will run into posts about AndroidX and Jetpack – which are essentially the new Support Library implementations. Trying to ties these back to Xamarin proved to be excessively time consuming and in the end I found that their implementations, e.g. nuget packages, are still in pre-release and documentation is sparce so I was reluctant to use them unless I really had no option. At this point I was considering using the Xamarin Forms option instead – but where’s the “fun” in that..?
The fix for my Fragment was to simply update the Android.App using statement to target the Support library instead:
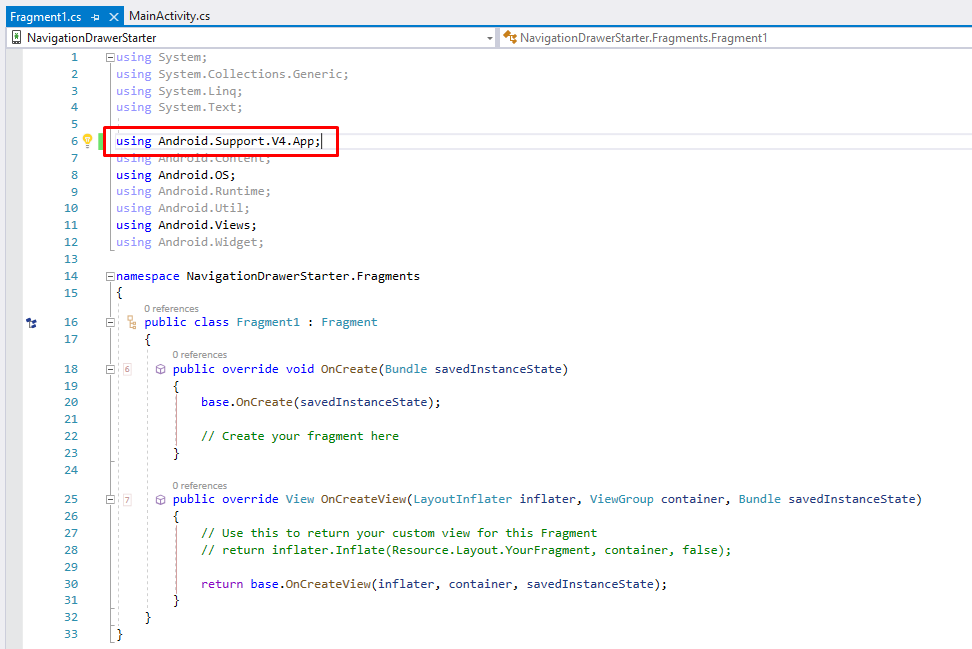
No more green squiggly line and the application builds just fine – all I need now is to create the Layout and write the code to swap out the Fragments based on the selected option from the menu in the slide out drawer – simple…..!
Wiring Up the Fragments
If you look at the structure of the solution that the template generated you will see that the content of the displayed in the main area of the UI is contained in a Layout view called content_main (Resources > layout > content_main.xml).
Opening this up we can see that this layout consists of a RelativeView with a TextView inside it.
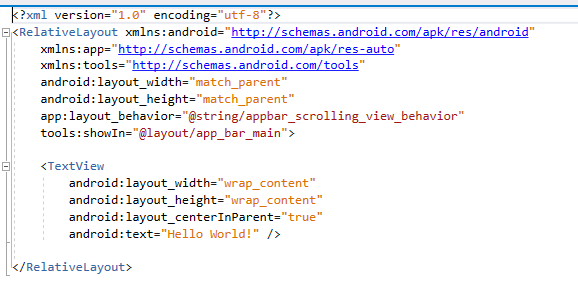
Fairly straightforward stuff here – but how do we swap our fragments in and out?
Well, as it stands – we can’t..! What we need to do is to change the RelativeLayout to a FrameLayout, give it an Id and remove the TextView (as it won’t be needed).
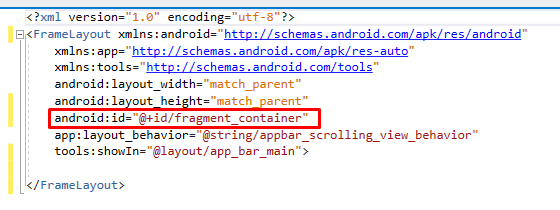
Now we have a container for our fragments we need to respond to the menu selections, inflate the appropriate fragment and ‘inject’ it into our FrameLayout.
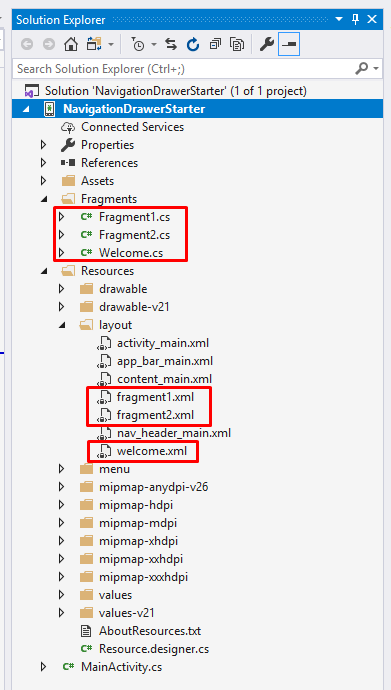
I have created three fragment classes with associated layouts – these are pretty basic with the layouts containing a single TextBox each and the corresponding classes just inflating them. You can download the finished solution from the link in the resource section at the bottom of this post.
The first thing we need to do is to set the initial layout state and for this we will display the ‘Welcome’ fragment as out ‘Home/Landing Page’
To do this we will need a FragmentManager, in particular – a Support Fragment Manager. Fortunately our generated MainActivity inherits from AppCompatActivity so it already has a property containing an instance of this class.
To set our initial layout we will need to create and commit a transaction via the Fragment Manager – don’t panic, it’s three lines of code which needs to be added to the OnCreate method of the MainActivity.
protected override void OnCreate(Bundle savedInstanceState)
{
    .
    .
    .
    .
    var welcomeTransaction = SupportFragmentManager.BeginTransaction();
    welcomeTransaction.Add(Resource.Id.fragment_container, new Welcome(), "Welcome");
    welcomeTransaction.Commit();
}
This will add in instance of a WelcomeFragment to the FrameLayout – essentially pushing the view onto it’s internal stack.
Now, I’ve seen a couple of trains of thought as to how to handle displaying the appropriate transaction based on the menu selection and they each have pros and cons;
- Add all of the required fragments to the FrameLayout, showing and hiding them as required (the FrameLayout will store the fragments in a Stack)
- Swap out fragments on demand so that the FrameLayout only ever contains a single child view.
With option 1 all of the fragments are loaded into the FrameLayout we are using as a Fragment Container with all but the initial view, in our case the Welcome fragment, hidden as part of the transaction. The upside of this approach is that it will maintain the state of each fragment even when it is hidden. The downside is that you will need to keep track of the currently displayed fragment so that it can be hidden when another menu option is selected and of course there is the memory consumption to think about – but this may not be a concern depending on your requirements.
Because my app is aimed at a persons privacy I don’t want all of the state to be kept in memory – when a menu option is selected I want the current fragment to be destroyed. With this in mind I’ll be implementing Option 2 and replacing the fragments as required so that the FrameLayout stack only ever contains a single fragment.
Scrolling down to the OnNavigationItemSelected handler we can now add our code to swap out the fragments (I’ve just updated the Gallery and Slideshow options here)
else if (id == Resource.Id.nav_gallery)
{
    var menuTransaction = SupportFragmentManager.BeginTransaction();
    menuTransaction.Replace(Resource.Id.fragment_container, new Fragment1(), "Fragment1");
    menuTransaction.Commit();
}
else if (id == Resource.Id.nav_slideshow)
{
    var menuTransaction = SupportFragmentManager.BeginTransaction();
    menuTransaction.Replace(Resource.Id.fragment_container, new Fragment2(), "Fragment2");
    menuTransaction.Commit();
}
So, almost the same three line as when we added the Welcome fragment (so a refactoring target) but this time we are replacing the contents of the FrameLayout (not replacing the layout itself, just it’s child views).
The result will be when the menu it opened (using the hamburger button or swiping from the left edge of the screen) and the Gallery or Slideshow option is clicked that the appropriate fragment will be loaded into the FrameLayout, replacing the one that was already these.
In Summary
Most apps need some form of menu and the fact that the NavigationDrawer template provides all the nice UI it does leave the developer having to trawl the internet to work out what to do next.
Even though I knew that fragments would be required there was very little in the way of documentation to be found, specifically about extending this template. Add this to the rabbit hole that is AndroidX/JetPack and it can become frustrating for developers new to Xamarin development.
While this post walks you through one implementation there are doubtless others out there. If you feel I’ve missed something then either leave a comment below or head over to the Github repository to post an issue of submit a pull request (whichever works best for you).
Resources
Full Source Code
Comments
Comments are now closedOne response
Thank you so much bro!